You’re ready for a relaxing day tending to your garden, hose in hand, but instead of watering the plants, you find yourself standing in a puddle. Your outdoor faucet has sprung a leak – again. I’ve been there; wrestling with pliers and washers on what was supposed to be my day off. It’s enough to make anyone throw in the towel.
Fixing A Leaking Outdoor Faucet, it sounds like quite the chore, right? But stick with me—what if I told you that by tackling this head-on, not only will you save water and protect your home from damage but also regain that sense of accomplishment?
In just a few short steps—armed with some basic tools—you’ll learn how easy it is to nip those pesky leaks in the bud once and for all. Say goodbye to slow drips and the annoyance they bring. Get ready, because you’re about to become your home’s plumbing hero.
Experience Year-Round Comfort with Anthem’s Comfort Club!
Are you looking to ensure your home’s HVAC system runs smoothly year-round without breaking the bank? Look no further! Join Anthem’s exclusive Comfort Club today for just 14.95 a month!
Table Of Contents:
- Experience Year-Round Comfort with Anthem’s Comfort Club!
- Diagnosing Your Leaky Outdoor Faucet
- Tools and Supplies for Repairing Your Faucet
- Shutting Off the Water Supply Before Repairs
- Step-by-Step Washer Replacement Guide
- Replacing a Faulty Valve Stem
- New Packing Nut Installation Step-by-Step
- Conclusion

Diagnosing Your Leaky Outdoor Faucet
You’ve got a leaky outdoor faucet and it’s driving you nuts. It’s like that one person at the party who won’t stop talking about their cat—annoying, persistent, and soaking everything in sight. Let’s tackle this drip-by-drip saga by spotting the tell-tale signs of when your outdoor spigot is crying for help.
When Water is Turned On
Say your faucet only leaks when you crank it on to water those thirsty petunias—that’s a clue Sherlock Holmes would be proud of. This usually screams “internal issues,” such as trouble with the stem packing or washer inside that old faithful hose bibb. You see, stem packings and washers are like bouncers at a club; they keep the unwanted from sneaking past when they shouldn’t.
If these components wear out, which happens more often than we’d like thanks to time or high water pressure, then bam. You get an unwanted water show every time you turn on that tap.
Leak Location Matters
Finding out whether your leaking outdoor faucet has decided to give up around its handle or from its spout will save you from playing eenie-meenie-miny-mo with repair methods later on. A leak frolicking around the handle area might point towards a faulty packing nut—a little tightening here can sometimes do wonders if it feels loose.
In contrast, if there’s a slow drip coming right from where the water should flow (the spout), well buddy, looks like we’re dealing with worn-out washers most likely caused by mineral deposits building up over time—or maybe even damage to something called the valve seat (not something you sit on but equally important).
No matter what kind of wet situation you’ve found yourself in though—a dripping outdoor faucet left unchecked can cause some real headaches including significant water waste, not to mention potential serious water damage to your home’s foundation if ignored too long.
Key Takeaway:
Got a leaky outdoor faucet? It’s more than just an annoyance—it hints at internal issues like worn-out stem packings or washers. Leaks from the handle could mean a quick fix by tightening the packing nut, but water dripping from the spout often signals deeper problems with washers or valve seats. Don’t ignore it; that drip can lead to costly damage.
Tools and Supplies for Repairing Your Leaking Outdoor Faucet

Gathering your gear before tackling a faucet repair is like prepping for a kitchen recipe—you want everything on hand so you’re not scrambling mid-task. A smooth fix starts with the right tools.
The Essentials List
First up, grab an adjustable wrench; it’s as essential as salt in cooking. Next, enlist a trusty screwdriver to help you pry off stubborn caps or unscrew any pesky parts holding your project hostage.
You’ll also need replacement parts—a worn washer can cause quite the commotion with its incessant dripping. While you’re at it, pick up some stem packing because no one likes a handle that weeps more than an onion-chopping chef.
Last but certainly not least, if your faucet has seen better days, it might be time for a washer assembly overhaul or even swapping out the whole valve stem setup. But remember to measure twice and buy once; getting the correct replacement parts saves another trip to the local hardware store where everyone knows you by name…and plumbing woes.
Now let’s get practical – leaks are no joke. Left unchecked they can lead to water waste equivalent to leaving your garden hose running while taking a weekend getaway – yikes. And don’t get me started on potential water damage; think of all those hard-earned dollars slipping through cracks along with every slow drip.
To ensure victory over vexing leaks:
- Lay out all your tools within easy reach because doing The Twist every two minutes isn’t fun unless Chubby Checker’s playing.
- If frost-proof faucets are giving you chills down your spine just thinking about them – breathe easy knowing that usually replacing their washers should do the trick nicely without having to replace the entire unit (phew.).
- In case rubber washers have gone harder than stale bread — simply swap ’em fresh ones from a hardware store kit designed specifically for this purpose.
Key Takeaway:
Gather your tools and replacement parts before diving into faucet repair to avoid mid-task mayhem. Think of it like having all ingredients ready before you start cooking.
Shutting Off the Water Supply Before Repairs
Imagine your outdoor faucet is like a mini Niagara Falls, gushing out water when all you wanted was to fill up the kiddie pool. To stop this aquatic spectacle and get down to business fixing that leaky spout, you’ve got to cut off its lifeline—the water supply.
Accessing the Shutoff Valve
Sneaking around in your basement or crawlspace might feel like a secret spy mission, but it’s just part of finding your main water shutoff valve. You’ll want to give that valve a firm twist clockwise—think “righty-tighty”—and watch as peace is restored and the risk of turning your yard into an accidental swamp decreases dramatically.
If you’re feeling lost on where this sneaky shutoff resides, take heart. It’s usually hanging out near where the water pipe enters your home. Sometimes it can be near the water meter.
Key Takeaway:
When your outdoor faucet won’t quit, remember: Shutting off the water supply is step one. Find that main valve, usually near where water enters your home or by the meter, and twist it right to stop the flow. It’s a big move for a small leak but saves gallons of waste.
Step-by-Step Washer Replacement Guide
1. Identify the Culprit Behind Faucet Leaks
Check if your outdoor spigot has turned into a mini fountain or if there’s just a pesky leak at the handle when water pressure rises as you turn it on. A worn washer often causes leaks straight from the spout—a clear sign it’s time for faucet washer replacement.
2. Gather Your Tools Like You Mean Business
No one brings a knife to a gunfight—and no one should start repairs without their trusty adjustable wrench and screwdriver by their side either. Make sure these essentials are within reach before getting down to business on that stubborn hose bibb.
You’ll also need new washers handy as well as any other replacement parts specific to your brand of faucet (like stem packing). With everything lined up, you’re now set for action.
3. Washer Swap-Out
Turn off that main water supply valve clockwise. Once things are dry, remove faucet handles carefully, since rough handling could mean more repair work later on.
Dive into the guts of the beast by loosening up the retaining nut until the old washer reveals itself, hiding under layers of grime and wear. But don’t stop there; this is just one step in conquering your leaky faucet foe.
Key Takeaway:
Stop the drip and save some cash by swapping out that old washer. Gear up with your wrench and screwdriver, turn off the water, and get ready to dive into a DIY fix for your leaky outdoor faucet.
Replacing a Faulty Valve Stem
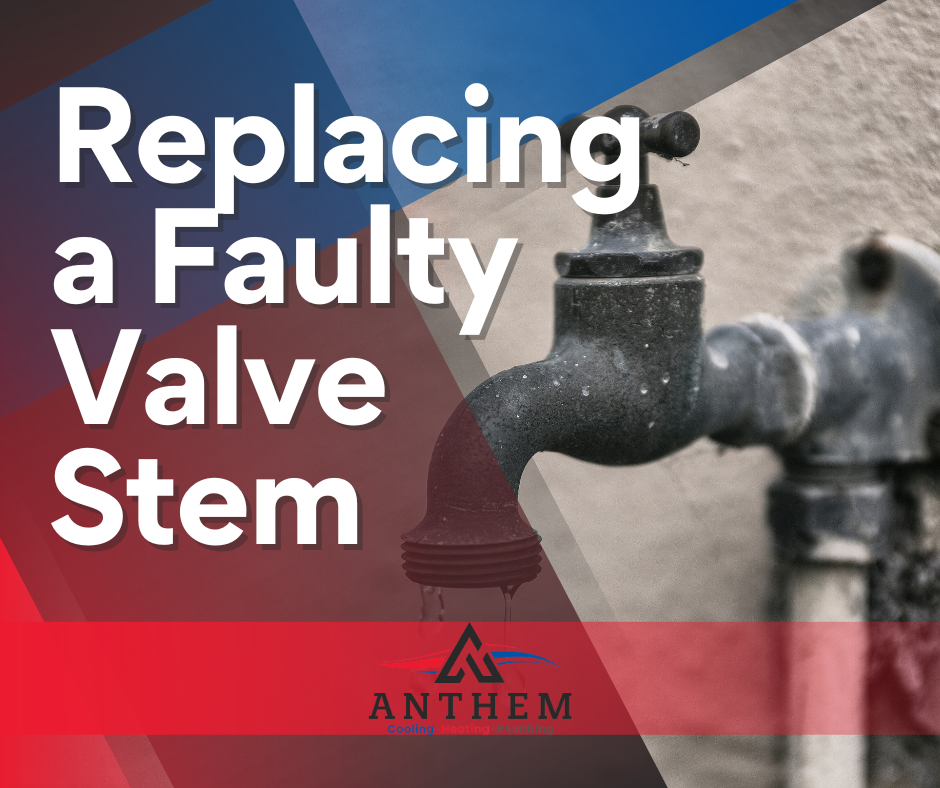
Say goodbye to that slow drip, drip, drip from your outdoor faucet—it’s likely your valve stem waving the white flag. If you’ve already tried fixing leaky washers and still have leaks, it might be time for a full-on valve stem replacement.
Understanding When It’s Time for Change
You know it’s time to replace the valve stem when simply tightening the packing nut doesn’t stop water from leaking around the handle. And if after swapping out old washers, your outdoor spigot keeps up its weeping act, this could point towards worn-out internals needing more than just minor repairs. Remember, not addressing these issues can lead to serious water waste and even property damage—think of that steady trickle as money down the drain and potential harm to your home’s foundation.
A correct replacement part is key here because mismatched parts are like trying to fit a square peg in a round hole—not going anywhere fast. So let’s get that faulty component sorted with some elbow grease and know-how.
Materials and Tools Needed:
- New valve stem
- Adjustable wrench or pipe wrench
- Screwdriver
- Penetrating oil or lubricant (if necessary)
- Plumber’s tape (Teflon tape)
- Rag or towel
Step-by-Step Instructions:
Turn Off Water Supply: Locate and turn off the main shut-off valve that controls the water supply to the outdoor faucet.
Drain the Faucet: Open the faucet to allow any remaining water in the line to drain completely.
Access the Valve Stem: Remove any handle or cover that conceals the valve stem. Use a screwdriver to loosen and remove screws if necessary.
Remove Packing Nut: Use an adjustable wrench to loosen and remove the packing nut that secures the valve stem. Turn it counterclockwise to unscrew it from the faucet assembly.
Remove Old Valve Stem: Pull the old valve stem out of the faucet assembly. Depending on the condition and design, you might need to wiggle or gently twist the stem to remove it. If it’s stuck, apply penetrating oil or a lubricant to ease its removal.
Inspect and Clean: Inspect the inside of the faucet assembly to ensure it’s clean and free from debris. Use a rag or towel to wipe away any dirt or residue.
Install New Valve Stem: Take the new valve stem and insert it into the faucet assembly. Ensure it fits correctly and aligns with the threads inside.
Reassemble the Faucet: Place the packing nut over the new valve stem and use the wrench to tighten it securely. Be cautious not to overtighten to avoid damaging the threads or the new stem.
Test for Leaks: Turn on the water supply and test the faucet to check for any leaks around the valve stem. If leaks are present, gently tighten the packing nut a bit more.
Apply Plumber’s Tape: Wrap plumber’s tape (Teflon tape) around the threads of the valve stem before reattaching the handle or cover. This helps create a better seal and prevents leaks.
Reattach Handle or Cover: Once the new valve stem is securely in place, reattach the handle or cover, ensuring it’s properly aligned and tightened.
Key Takeaway:
Stop the endless drip from your outdoor faucet by replacing a faulty valve stem. Make sure you’ve got all your tools and the right replacement part to avoid multiple hardware store runs. Tackle it with confidence—out with the old, in with the new, for a leak-free spigot that lasts.

New Packing Nut Installation Step-by-Step
The packing nut insulation in a faucet is crucial for preventing leaks around the valve stem. It’s not insulation in the traditional sense; rather, it’s a component that consists of a packing material (often made of graphite, Teflon, or similar substances) placed inside the packing nut to create a watertight seal around the stem.
Materials and Tools Needed:
- New packing material (usually graphite or Teflon)
- Adjustable wrench or pipe wrench
- Screwdriver (if needed)
- Grease (optional)
- Plumber’s tape (Teflon tape)
- Rag or towel
Step-by-Step Instructions:
Turn Off Water Supply: Locate the shut-off valve that controls the water supply to the outdoor faucet. Turn it off completely to prevent water from flowing while you work.
Drain the Faucet: Open the faucet to drain any remaining water in the line. This step helps prevent water from leaking or spraying when you disassemble the faucet.
Access the Packing Nut: Depending on the faucet design, you might need to remove a handle or cover to access the packing nut. Use a screwdriver to remove any screws or covers necessary.
Loosen the Packing Nut: Use an adjustable wrench or pipe wrench to loosen the packing nut. Turn it counterclockwise to loosen and remove it from the faucet assembly. Be gentle to avoid damaging the threads.
Remove Old Packing Material: Once the packing nut is removed, you’ll see the old packing material inside the faucet assembly. Clean out any remnants of the old packing material using a rag or towel. Ensure the area is clean and free from debris.
Install New Packing Material: Cut a piece of the new packing material (graphite or Teflon) according to the size needed to fit into the faucet assembly. Wrap the new packing material around the stem or place it inside the assembly, ensuring a snug fit.
Reassemble the Faucet: Carefully reinsert the packing nut over the new packing material. Use the wrench to tighten the nut securely but avoid over-tightening to prevent damage.
Test for Leaks: Turn on the water supply and test the faucet to ensure there are no leaks. If you notice any leaks, gently tighten the packing nut a bit more.
Optional: Apply Grease and Teflon Tape: If recommended for your specific faucet type, you can apply a small amount of plumber’s grease to the packing material before reassembling. Additionally, wrap plumber’s tape (Teflon tape) around the threads of the faucet stem before reinstalling the packing nut for a more secure seal.
Replace Handle or Cover: If you removed a handle or cover to access the packing nut, reattach it securely.
Key Takeaway:
Stop that leaky outdoor faucet by simply replacing the packing nut—a quick fix that saves money and prevents water damage. With a wrench in hand, shut off your water supply, remove the old nut, then find a matching new one at your local hardware store for an easy DIY solution.
Conclusion
Time to put your know-how into practice! How to fix a leaking outdoor faucet isn’t just about stopping drips—it’s safeguarding your home from water damage and conserving precious resources.
Remember the basics: Diagnose first, gather your tools next, then shut off that water supply before diving into repairs. Whether it was replacing a worn washer or installing a new valve stem, each step brought you closer to leak-free bliss.
Tackle leaks with confidence. With every twist of the wrench and turn of the screwdriver, you’re mastering outdoor faucet repair. Keep these tips handy for when water goes rogue again—because now you’re equipped to handle it all.
And don’t forget—the right fix not only stops wasteful drips but also brings peace of mind knowing your garden days will be puddle-free and utterly productive once more.
Experience Year-Round Comfort with Anthem’s Comfort Club!
Are you looking to ensure your home’s HVAC system runs smoothly year-round without breaking the bank? Look no further! Join Anthem’s exclusive Comfort Club today for just $14.95 a month!
Membership perks include:
2) Bi-Annual Maintenance Visits: Spring AC tune-up & fall furnace check-up. No hassle scheduling – we’ll reach out when it’s time!
Exclusive Discounts: Enjoy 15% off AC & heater repairs, IAQ products, and duct cleanings.
Reduced Service Fee: Pay only $69 for service calls (normally $99).
Priority Scheduling: Guaranteed scheduling within 24 hours for club members.
Priority Service: On sweltering days, your unit becomes our top priority!
Extended Equipment Lifespan: Keep your HVAC system running longer.
Enhanced Energy Efficiency: Save on utility bills with optimized systems.
And more! Don’t miss out on these incredible benefits! Call Anthem at (855) 268-4369 or visit Anthem’s Website to sign up and schedule your estimate today!