As summer heats up in Coachella Valley, residents are using more water than ever. From keeping gardens lush to cooling off in swimming pools, the demand for water skyrockets during these hotter months. However, with increased water use comes a concern that many residents may overlook: changes in water quality. Noticing sediment in your water or a change in its taste could be a sign that your plumbing system needs attention. Let’s dive into why this happens and how you can ensure your water remains clean and safe all summer long.
Understanding Water Quality Issues
Water quality can be influenced by a variety of factors, especially during the summer when water usage spikes. Common issues that residents might encounter include:
Sediment in Water: As water usage increases, sediments can become dislodged within your plumbing system, making their way into your water supply. This can be particularly noticeable if you have an older home with aging pipes.
Changes in Taste: Increased water consumption can also affect the taste of your water. This could be due to higher levels of chlorine used in municipal water supplies during the summer, or it might indicate contaminants that need to be addressed.
Cloudy Water: Sometimes, the water might appear cloudy or milky. This can be due to air bubbles in the water, which are generally harmless, but it can also indicate the presence of other substances that require filtration.
Unpleasant Odors: If your water has a strange smell, it could be a sign of bacterial growth or other contaminants, particularly if your plumbing system is not regularly maintained.
The Importance of Filtration
One of the most effective ways to ensure your water quality remains high is through proper filtration. Water filtration systems can remove sediments, improve taste, and eliminate contaminants, providing you with clean and safe water. Here are some common types of water filtration systems you might consider:
Carbon Filters: These are effective at removing chlorine, sediment, and volatile organic compounds (VOCs) from your water, improving both its taste and quality.
Reverse Osmosis Systems: These systems are excellent for removing a wide range of contaminants, including heavy metals, chemicals, and microorganisms.
UV Filters: UV filtration uses ultraviolet light to kill bacteria and viruses, ensuring your water is safe to drink.
When to Call the Experts
While some water quality issues can be addressed with over-the-counter filtration systems, others might require professional intervention. This is where Anthem AC, Heating & Plumbing Services comes in. With over 20 years of combined HVAC experience, our team is dedicated to providing the best plumbing services in the valley. Our highly qualified, friendly, and clean service technicians are ready to tackle any water quality issues you may face.
Regular Maintenance is Key
To prevent water quality issues from arising in the first place, regular plumbing maintenance is essential. Here are some maintenance tips to keep your water quality in check:
Inspect Your Pipes: Regularly check your pipes for signs of wear and tear. Look for leaks, rust, or other damage that could affect your water quality.
Flush Your System: Periodically flushing your plumbing system can help remove sediments that have built up over time.
Service Your Water Heater: Sediment can accumulate in your water heater, affecting its efficiency and the quality of your hot water. Make sure to have it serviced regularly.
Check for Contaminants: If you notice any changes in your water quality, have your water tested for contaminants. This can help you identify and address any issues promptly.
Anthem’s Commitment to Quality
At Anthem, we take pride in being your go-to source for all your plumbing needs. Our team of dedicated plumbing technicians is committed to delivering top-notch service that exceeds your expectations. Whether you need a new filtration system installed, your pipes inspected, or your water quality tested, we are here to help.
Our comprehensive plumbing services include:
Water Quality Testing: We can test your water for a wide range of contaminants to ensure it is safe for you and your family.
Filtration System Installation: Our experts can help you choose the right filtration system for your needs and install it for optimal performance.
Pipe Inspection and Repair: We use the latest technology to inspect your pipes and identify any issues that could affect your water quality.
Water Heater Maintenance: Regular maintenance of your water heater can prevent sediment buildup and ensure you have hot water when you need it.
Why Choose Anthem?
Choosing Anthem means choosing a team that values quality, professionalism, and customer satisfaction. With our extensive experience and commitment to excellence, you can trust us to handle all your plumbing needs. We understand the unique challenges that Coachella Valley residents face during the summer, and we are here to ensure your water remains clean and safe.
Conclusion
Water quality is a critical concern, especially during the summer when water usage increases. By understanding the common issues and taking proactive steps to address them, you can ensure that your water remains safe and pleasant to use. Whether you need a filtration system, regular maintenance, or professional plumbing services, Anthem AC, Heating & Plumbing Services is here to help. Contact us today to learn more about how we can assist you with all your water quality concerns.
I want to tell you a secret. There’s a way to bring the spa experience right into your own home, and it’s not as complicated as you might think. I’m talking about installing a steam shower. Imagine stepping into a warm, misty oasis every morning, letting the steam melt away your stress and soothe your muscles. It’s like having your own personal spa available whenever you need it.
But the benefits of a steam shower go beyond just relaxation. Studies have shown that regular steam sessions can improve circulation, boost immune function, and even help with respiratory issues. And let’s be real, who doesn’t want glowing, hydrated skin? A steam shower can do that, too.
So, are you ready to transform your bathroom into a luxurious retreat? Let’s dive into the world of steam showers and discover how you can create your own slice of heaven at home.
Are you looking to ensure your home’s HVAC system runs smoothly year-round without breaking the bank? Look no further! Join Anthem’s exclusive Comfort Club today for just $14.95 a month!
If you live in a dry climate like the Coachella Valley, you know the struggle of dealing with relentless heat and dry air, especially during the summer months. It can leave your skin feeling parched, flaky, and irritated. But there’s a solution that can help counteract these effects while offering numerous health and wellness benefits: steam showers.
Hydration for Skin
One of the biggest advantages of using a steam shower in a dry climate is the hydration it provides for your skin. The humid environment created by the steam helps your skin retain moisture, resulting in a softer, more supple complexion. Say goodbye to dryness and fine lines.
Respiratory Relief
Dry air can also wreak havoc on your respiratory system, causing symptoms like congestion, coughing, and irritation. However, the humidity from a steam room can help alleviate these issues by moisturizing your airways and making it easier to breathe. As someone who suffers from allergies, I’ve found that regular steam sessions make a noticeable difference in my respiratory health.
Health Benefits of Steam Showers
Beyond just helping your skin and respiratory system, there are so many other health benefits that come with regular use of steam showers. Let’s explore a couple of the most significant ones.
Detoxification
Sweating is one of the body’s natural ways of removing toxins, and boy, does a steam shower make you sweat. The heat from the steam causes your pores to open up, allowing impurities to be flushed out. It’s like giving your body a deep clean from the inside out.
Improved Circulation
Another major benefit of steam showers is improved circulation. The heat causes your blood vessels to dilate, which increases blood flow throughout your body. This delivers more oxygen and nutrients to your skin, giving you a healthy glow. Plus, better circulation can help soothe sore muscles and relieve joint pain.
Enhancing Home Value with Steam Showers
Not only do steam showers offer incredible health benefits, but they can also increase the value of your home. In a luxury market like the Coachella Valley, having a steam shower installed can be a major selling point for potential buyers. It’s a feature that sets your home apart and adds a touch of spa-like luxury.
Components of a Steam Shower System
So, what exactly goes into a steam shower system? Let’s break down the essential components.
Steam Generator
The heart of any steam shower is the generator. This is the unit that heats the water to produce steam. It’s typically powered by electricity and can be controlled with digital controls. The size of the generator will depend on the size of your shower and the amount of steam you want to produce.
Choosing the Right Steam Shower Kit
When it comes to installing a steam shower, you have options. You can go with a complete shower kit that includes everything you need, or you can customize your setup to fit your specific bathroom and preferences. Factors to consider include the size of your shower, the materials you want to use (like ceramic tile), and any additional features you want to incorporate.
Installation Considerations for Steam Showers
Installing a steam shower isn’t a DIY project – it’s best left to the professionals. However, there are some key factors to keep in mind when planning your installation. Proper ventilation is crucial, as is maximizing space in your bathroom. You’ll also want to make sure your shower is fully enclosed to keep the steam inside.
Enhancing Your Spa Experience at Home
One of the best things about having a steam shower at home is that you can create your own luxury spa experience anytime you want. Light some candles, play some soothing music, and let the steam work its magic. It’s the ultimate way to unwind after a long day and treat yourself to some well-deserved self-care.
Additional Features for Your Steam Shower
Want to take your steam shower to the next level? Consider adding some extra features like digital controls, built-in speakers, or custom seating. These little luxuries can make a big difference in your overall experience and help you create a true spa-like atmosphere.
Key Takeaway:
Steam showers in dry climates like the Coachella Valley can hydrate your skin, ease respiratory issues, and improve circulation. They also detoxify your body through sweating and boost home value by adding a touch of luxury. Enhance this experience with digital controls or custom seating for an at-home spa retreat.
Conclusion
A steam shower is more than just a bathroom upgrade; it’s an investment in your health and well-being. By creating your own spa-like oasis at home, you’re giving yourself the gift of relaxation, rejuvenation, and endless health benefits.
A steam shower can transform your daily routine into a luxurious experience by improving your skin and respiratory function and melting away stress and tension. Plus, with a variety of customization options and features available, you can create a steam shower that perfectly fits your needs and style.
So why wait? Start planning your dream steam shower today and get ready to indulge in the ultimate home spa experience. Your mind, body, and soul will thank you.
Experience Year-Round Comfort with Anthem‘s Comfort Club!
Are you looking to ensure your home’s HVAC system runs smoothly year-round without breaking the bank? Look no further! Join Anthem’s exclusive Comfort Club today for just $14.95 a month!
Membership perks include:
2) Bi-Annual Maintenance Visits: Spring AC tune-up & fall furnace check-up. No hassle scheduling – we’ll reach out when it’s time!
Exclusive Discounts: Enjoy 15% off AC & heater repairs, IAQ products, and duct cleanings.
Reduced Service Fee: Pay only $69 for service calls (normally $99).
Priority Scheduling: Guaranteed scheduling within 24 hours for club members.
Priority Service: On sweltering days, your unit becomes our top priority!
Extended Equipment Lifespan: Keep your HVAC system running longer.
Enhanced Energy Efficiency: Save on utility bills with optimized systems.
And more! Don’t miss out on these incredible benefits! Call Anthem at (855) 268-4369 or visit Anthem’s Website to sign up and schedule your estimate today!
I’ve got a confession: I used to think water filtration was just a fancy add-on for rich folks. Boy, was I wrong! Turns out, investing in a good water filtration system for your home is like giving your body, your appliances, and your wallet a big ol’ bear hug.
Think about it – we use water for everything from drinking and cooking to bathing and laundry. Don’t you want that water to be as clean and pure as possible? I know I do!
Having clean, filtered water right from your tap isn’t just nice; it’s life-changing. Curious about stepping up your H2O game? Let me show you where to begin.
Are you looking to ensure your home’s HVAC system runs smoothly year-round without breaking the bank? Look no further! Join Anthem’s exclusive Comfort Club today for just $14.95 a month!
Water is life. It’s the foundation of our health, our homes, our world. But here’s the dirty truth: tap water can be filled with all sorts of nasty contaminants that can wreak havoc on your body, your appliances, and the environment. That’s where a water filtration system comes in. It’s not just a luxury – it’s a necessity. A game-changer for your health, your comfort, and the planet. Picture this: every time you turn on the tap, you’re greeted with a stream of clean, pure, healthy water. Water that’s free from harmful contaminants like chlorine, lead, and bacteria. Water that tastes crisp and refreshing, without any funky odors or aftertaste. That’s the power of a whole home water filtration system. It provides cleaner, healthier water for drinking, cooking, and bathing. So, every member of your household – even your furry friends – can enjoy the benefits of filtered water.
Better Taste and Odor of Drinking Water
Let’s be real: unfiltered tap water can taste and smell pretty gross. It’s like drinking from a swimming pool or a rusty pipe. But with a water filtration system, you can say goodbye to those unpleasant flavors and odors. Filtered water simply tastes better. It’s crisp, clean, and refreshing – the way water should be. So you can actually enjoy drinking from the tap without holding your nose or reaching for bottled water.
Environmental Advantages of Home Water Filtration
Speaking of bottled water… did you know that using a water filter can help reduce plastic waste? It’s true. When you have delicious, filtered water straight from your tap, there’s no need to rely on single-use plastic bottles. Plus, a whole home filtration system is a more sustainable choice in the long run. You’re not constantly throwing away plastic filters or pitchers. Instead, you have a durable, efficient system that lasts for years – saving you money and reducing your environmental impact.
Understanding Different Water Filtration Systems
Okay, so you’re sold on the idea of a water filtration system. But with so many options out there, how do you choose the right one for your home? It can feel overwhelming, I know. But don’t worry – I’m here to break it down for you. Let’s start with the basics: pitchers and countertop filters. These are your entry-level options for filtering drinking water. They’re affordable, easy to use, and don’t require any installation. With a pitcher or countertop filter, you simply fill it up with tap water and let the filter do its thing. The result is cleaner, better-tasting water for drinking and cooking.
Under-Sink and Whole Home Systems
But what if you want filtered water from every tap in your home? That’s where under-sink and whole home systems come in. An under-sink filter is installed (you guessed it) under your kitchen sink. It filters the water from that specific tap, providing clean drinking water on demand. A whole-home system, on the other hand, is installed at your home’s main water line. So it filters all the water coming into your house – from the shower to the dishwasher to the garden hose. It’s like having a personal water treatment plant right in your home.
Maintenance and Cost Considerations for Water Filtration Systems
Now, I know what you might be thinking: “This all sounds great, but what’s the catch? How much is this going to cost me?” It’s a valid question. The truth is that a water filtration system is an investment. But it’s an investment in your health, your home, and your future. Yes, there’s an upfront cost to installing a water filtration system. But when you consider the long-term savings, it starts to look like a pretty smart investment. Think about all the money you’ll save on bottled water. Or the costly repairs and replacements for appliances damaged by hard water. Not to mention the potential health costs of drinking contaminated water.
Regular Maintenance to Ensure Efficiency
Of course, like any appliance, a water filtration system does require some maintenance to keep it running smoothly. This typically involves replacing filters or adding salt, depending on the type of system you have. But don’t let that scare you off. The maintenance is usually pretty simple and inexpensive – a small price to pay for the peace of mind and health benefits of filtered water.
Benefits Beyond Drinking Water
By now, you’re probably realizing that a water filtration system is about so much more than just drinking water. It’s a whole-home solution that can improve your quality of life in countless ways. Hard water is notorious for causing buildup and damage to appliances and fixtures. But with a water softener or filtration system, you can protect your investments and extend their lifespan. Filtered water is gentler on your pipes, your washing machine, your coffee maker – basically anything that uses water. So you can say goodbye to those pesky calcium stains and hello to smoother, more efficient operation.
Enhanced Skin Health from Filtered Water Use
And let’s not forget about the biggest organ in your body: your skin. The water you bathe and shower in can greatly impact your skin health. Unfiltered water can be harsh and drying, stripping your skin of its natural oils. But filtered water is gentler and more nourishing, leaving your skin soft, smooth, and healthy. So there you have it – the unfiltered truth about water filtration. It’s not just a luxury, it’s a necessity. An investment in your health, your home, and the planet.
Key Takeaway:
Water filtration isn’t just for taste; it’s a health and eco-friendly must-have that protects your appliances, saves money on bottled water, and offers better skin care. Dive into cleaner living with the right system for you.
Conclusion
Water filtration in the home isn’t just a luxury – it’s a necessity. Think of investing in a high-quality water filter as hitting multiple birds with one stone – it doesn’t just enhance how your drinking water tastes and smells and guards against harmful contaminants that could affect your well-being and household gadgets.
Going for that big leap with a whole-house setup or starting off easy with a counter filter puts you right on track for boosting your well-being and protecting our planet.
So, don’t wait – start exploring your water filtration options today. Your body (and your plumbing) will thank you!
Experience Year-Round Comfort with Anthem‘s Comfort Club!
Are you looking to ensure your home’s HVAC system runs smoothly year-round without breaking the bank? Look no further! Join Anthem’s exclusive Comfort Club today for just $14.95 a month!
Membership perks include:
2) Bi-Annual Maintenance Visits: Spring AC tune-up & fall furnace check-up. No hassle scheduling – we’ll reach out when it’s time!
Exclusive Discounts: Enjoy 15% off AC & heater repairs, IAQ products, and duct cleanings.
Reduced Service Fee: Pay only $69 for service calls (normally $99).
Priority Scheduling: Guaranteed scheduling within 24 hours for club members.
Priority Service: On sweltering days, your unit becomes our top priority!
Extended Equipment Lifespan: Keep your HVAC system running longer.
Enhanced Energy Efficiency: Save on utility bills with optimized systems.
And more! Don’t miss out on these incredible benefits! Call Anthem at (855) 268-4369 or visit Anthem’s Website to sign up and schedule your estimate today!
Imagine stepping into your home after a long day, only to be greeted by an unwelcome pool of water in the living room. The culprit? Often overlooked, yet vital: plumbing fixtures. These silent heroes work tirelessly behind the scenes, ensuring water flows where it should – until they don’t. A staggering 10% of homes have leaks that waste 90 gallons or more per day. It’s not just about the annoyance of a dripping faucet; it’s the hidden havoc wreaked on your home and wallet.
The truth is simple but often ignored: regular checks can prevent these disasters. Yet many homeowners in Coachella Valley find themselves caught off guard by plumbing woes that could have been easily avoided with some foresight and a professional inspection checklist. Why wait for disaster to strike when preventive measures exist?
So, welcome aboard Project Anthem – here, we’re all about turning what was into a guide for what’s next.
Are you looking to ensure your home’s HVAC system runs smoothly year-round without breaking the bank? Look no further! Join Anthem’s exclusive Comfort Club today for just $14.95 a month!
When was the last time you had your home’s plumbing inspected? If it’s been a while (or never), you could be setting yourself up for some serious headaches down the road. Regular plumbing inspections are crucial for maintaining your home’s health and efficiency.
Think of it like going to the dentist for a checkup. You might not have any cavities or issues now, but by catching potential problems early, you can save yourself from a root canal (or in this case, a burst pipe) later on. And here’s a little something extra – taking good care of your water system not only boosts the quality and taste of your water but also cranks up its efficiency.
Identifying Common Plumbing Issues
So, what kind of problems can arise without regular inspections? Leaks are a big one. Even a small leak can waste gallons of water and cause damage to your home if left unchecked. Calcium buildup is another common issue, especially in areas with hard water. Over time, this buildup can clog pipes and reduce water flow.
On top of that, you might run into a few other hiccups like pipes that have seen better days, water heaters on the fritz, and drains that just refuse to do their job. The scary part? Many of these issues can go unnoticed until they cause major damage. That’s why regular inspections are so important.
Benefits of a Professional Plumbing Inspection
Sure, you could try to inspect your plumbing yourself, but let’s be real – unless you’re a professional plumber, you might miss something important. That’s where a professional plumbing inspection comes in.
During an inspection, a licensed plumber will thoroughly check all of your home’s plumbing components, from the water heater to the sewer lines. They’ll look for any signs of wear and tear, leaks, or other potential issues. If they find something, they can fix it on the spot or recommend a course of action to prevent further damage.
Not only can professional inspections catch potential issues early, but they can also save you money in the long run. Tackling those little issues before they balloon into bigger headaches can save you a bundle on repairs, and hey, it might even give your plumbing components a bit longer to live. Plus, many plumbers offer inspection checklists and maintenance plans to keep your system in tip-top shape.
Essential Components to Check During a Plumbing Inspection
Now that you know why regular plumbing inspections are so important, let’s dive into what actually gets checked during an inspection. While every home is different, some key areas should always be on the list.
Kitchen and Bathroom Focus
It’s no surprise that the kitchen and bathroom are the most common areas for plumbing issues. With all the sinks, toilets, and appliances, there are plenty of opportunities for leaks and clogs. During an inspection, your plumber will check all the faucets, drains, and supply lines for any signs of wear or damage.
They’re not stopping at just a quick look-see; they’ll dive into your garbage disposal, dishwasher, and other gadgets to double-check that everything’s hooked up right and running smoothly. If you have a water pressure issue, they can use a pressure gauge to diagnose the problem.
Water Heater Maintenance
Your water heater is another critical component of your plumbing system. During an inspection, your plumber will check for any signs of corrosion or leaks. They’ll also flush the tank to remove any sediment buildup, which can improve efficiency and extend the life of your heater.
If you have an older water heater, your plumber may recommend replacing the anode rod. This sacrificial rod helps protect the tank from corrosion, but it can wear out over time. Replacing it can help prevent leaks and extend the life of your heater.
Outdoor Plumbing Vigilance
Don’t forget about your outdoor plumbing. During an inspection, your plumber will check all your outdoor faucets and hose bibs for any signs of leaks or damage. They’ll also take a look at your irrigation system to make sure it’s properly connected and functioning.
If you have a septic system, your plumber will also inspect your sewer lines and drain field for any signs of damage or clogs. Tree roots can be a common culprit for sewer line issues, so it’s important to catch them early before they cause a major backup.
Seasonal Plumbing Preparation Tips for Coachella Valley Homeowners
Living in the Coachella Valley, you know that the weather can be extreme. From scorching summers to chilly winters, your plumbing system needs to be prepared for anything. Here are some seasonal tips to keep in mind:
Winterizing Your Plumbing System
While we don’t get the same freezing temperatures as other parts of the country, it’s still important to take steps to prevent freezing in your pipes. If you’re a snowbird heading out of town for the winter, make sure to shut off your main water supply and drain your pipes before you leave.
You can also insulate your pipes to help prevent freezing, especially in unheated areas like your garage or attic. If you do encounter a frozen pipe, never try to thaw it with an open flame. Instead, use a hair dryer or heating pad to gradually warm the pipe.
Preparing for Summer Heat
On the flip side, the summer heat can also take a toll on your plumbing. High temperatures can cause your pipes to expand and contract, which can lead to leaks and cracks over time. Make sure to check your water pressure regularly and adjust it if necessary to prevent strain on your pipes.
You should also be mindful of your water usage during the summer months. With more people at home and the temptation to take longer showers or run the sprinklers more often, it’s easy to overload your system. Consider installing low-flow fixtures or setting a timer for your outdoor watering to help conserve water and prevent strain on your pipes.
Advanced Plumbing Maintenance Techniques Every Homeowner Should Know
So, you’ve got the basics of plumbing inspections down pat. But why stop there? Here are some advanced maintenance techniques that every homeowner should have in their toolkit:
Utilizing Baking Soda Mixes for Drain Maintenance
Before you reach for the harsh chemicals to clear a clogged drain, try this simple DIY solution: mix equal parts baking soda and vinegar, then pour it down the drain. Let it sit for a few minutes, then flush with hot water. This bubbly reaction is just the trick for breaking up those pesky small blockages and keeping your drains smelling like they’re fresh out of a spa.
For tougher clogs, you can try a mixture of baking soda and salt. Pour a cup of each down the drain, then follow with a pot of boiling water. Let it sit overnight, then flush with hot water in the morning. This abrasive mixture can help scrub away buildup and clear the way for better water flow.
The Importance of Sump Pump Inspections
If you have a basement or live in an area prone to flooding, a sump pump is a crucial component of your plumbing system. This device helps pump water out of your home and prevent damage to your foundation and belongings. But like any mechanical device, it needs regular maintenance to function properly.
During a sump pump inspection, your plumber will check for any signs of wear or damage, such as cracks in the basin or a faulty float switch. They’ll also test the pump to make sure it’s working properly and can handle the flow of water in case of a heavy rainstorm. If you have a battery backup system, they’ll check that too to ensure you’re prepared for any power outages.
Addressing Tree Root Intrusions in Sewer Lines
Tree roots are a common culprit for sewer line clogs and damage. As trees grow, their roots seek out sources of water, and your sewer lines are a prime target. Over time, these roots can infiltrate your pipes, causing clogs and even ruptures.
If you suspect tree roots are causing issues with your sewer lines, it’s important to address the problem ASAP. Your plumber can use a special camera to inspect your pipes and determine the extent of the damage. From there, they can recommend a course of action, such as trenchless sewer line repair or even replacing the affected pipes altogether.
To keep future headaches at bay, it might be a smart move to clear away any trees or bushes hugging your sewer lines too closely. You can also have your plumber install a root barrier to discourage future growth. Regular inspections can also help catch any potential issues before they become major problems.
Key Takeaway:
Just like a dentist check-up can prevent a root canal, regular plumbing inspections can save you from burst pipes and costly repairs. A pro plumber will spot leaks, buildup, and wear early on to keep your home running smoothly.
Conclusion
So, there you have it. The silent heroes of our homes – the plumbing fixtures – aren’t as quiet as we thought. With every turn of a faucet and flush of a toilet, they’ve been telling us stories; tales of leaks waiting to happen, and disasters ready to unfold in our Coachella Valley homes. But with knowledge comes power – the power to prevent, protect, and preserve.
We journeyed through the importance of regular plumbing inspections like seasoned detectives on a mission. We uncovered common issues lurking beneath our sinks and behind walls. Leaks? Calcium buildup? All just breadcrumbs leading us back to one truth: prevention is key.
Then we stepped into the realm where professionals tread, realizing that sometimes calling in the cavalry isn’t an admission of defeat but rather a strategic move towards victory against potential costly repairs.
We navigated through kitchens and bathrooms, water heaters, and outdoor faucets – all integral parts demanding our vigilance for signs hinting at wear or damage.
The seasons rolled by too; from winter’s chill requiring protective measures against freezing pipes to summer’s blaze reminding us about maintaining cool efficiency amidst scorching heatwaves.
And let’s not forget those advanced techniques tucked up our sleeves – baking soda mixtures dancing down drains or vigilant checks on sump pumps prepared for stormy sieges.
All this hustle isn’t just about dodging problems; it’s a leap into embracing cool innovations that make our lives comfier and safer and might even cut down on those pesky utility bills through smart tech carving out new roads ahead.
Are you looking to ensure your home’s HVAC system runs smoothly year-round without breaking the bank? Look no further! Join Anthem’s exclusive Comfort Club today for just $14.95 a month!
Deciding on the right water softener system goes beyond simply picking out a device; it’s essentially about elevating the quality of water that flows through your home. This guide is your go-to for understanding the nuts and bolts of making that change. Embarking on this journey, you’ll explore the realm of hard water, unraveling how various systems confront this issue and illuminate the distinct qualities that set each method apart.
We’re breaking down everything from ion exchange to salt-free wonders, giving you the insights needed to make an informed decision. Plus, we’ll touch on installation considerations specific to Coachella Valley homes. By the end of this read, selecting a system will feel less like a daunting task and more like stepping up for your home’s health.
Are you looking to ensure your home’s HVAC system runs smoothly year-round without breaking the bank? Look no further! Join Anthem’s exclusive Comfort Club today for just $14.95 a month!
Understanding Hard Water and Its Effects in Coachella Valley
In the sun-drenched expanse of Coachella Valley, hard water is more than just a minor inconvenience; it’s a daily challenge for homeowners. Characterized by its high mineral content, primarily calcium and magnesium, this type of water can lead to various household headaches.
Hard Water: A Mineral Menace
The arid climate of the valley doesn’t do residents any favors when it comes to water quality. The heavy minerals present in the local water supply aren’t just numbers on a test report—they’re culprits behind scale buildup in pipes and appliances, making them work harder and wear out faster. This isn’t just hearsay; anyone who’s had to replace an appliance or call a plumber for issues directly linked to hard water knows exactly how real—and expensive—the struggle is.
Beyond the plumbing woes, these mineral deposits have personal effects too. Dry skin and hair are common complaints among locals, pointing directly back to their showers’ hard water output.
A Closer Look at Local Impact
The prevalence of hard water in Coachella Valley isn’t merely anecdotal—it’s practically endemic due to geographical factors that funnel mineral-rich waters into our homes. While some might consider it just part of desert living, understanding its impacts can motivate seeking solutions like water softeners or conditioners designed specifically for combating these challenges.
The Science Behind Water Softening
Ion Exchange Process
Imagine your hard water is like a rock band, loud and full of energy (or in this case, minerals). The ion exchange process acts as the soundproofing that tones down the chaos. Here’s how it rocks: calcium and magnesium ions – the lead singers causing all the noise – get swapped out for quieter sodium ions courtesy of resin beads. This swap isn’t just any backstage pass exchange; it’s a well-orchestrated dance ensuring that what flows out of your tap sings in softness.
Through ion exchange, a sophisticated chemical ballet, not only is the appearance of water enhanced, but its very structure is transformed to better serve household and appliance needs. While some may worry about adding sodium to their diet through softened water, rest assured that only trace amounts make their way into drinking glasses.
Regeneration Cycle Explained
To keep hitting those high notes without losing quality, salt-based water softeners undergo what’s known as a regeneration cycle. Think of this as the encore performance where resin beads recharge with sodium ions from brine tank reserves to stay ready for action. It’s not merely an intermission but a crucial reset ensuring every drop remains consistently softened.
This necessity stems from salt-based systems’ effectiveness at removing pesky minerals responsible for scale buildup on fixtures and appliances alike – preserving both functionality and aesthetic appeal over time while requiring maintenance efforts including regular salt refills.
Types of Water Softeners Available
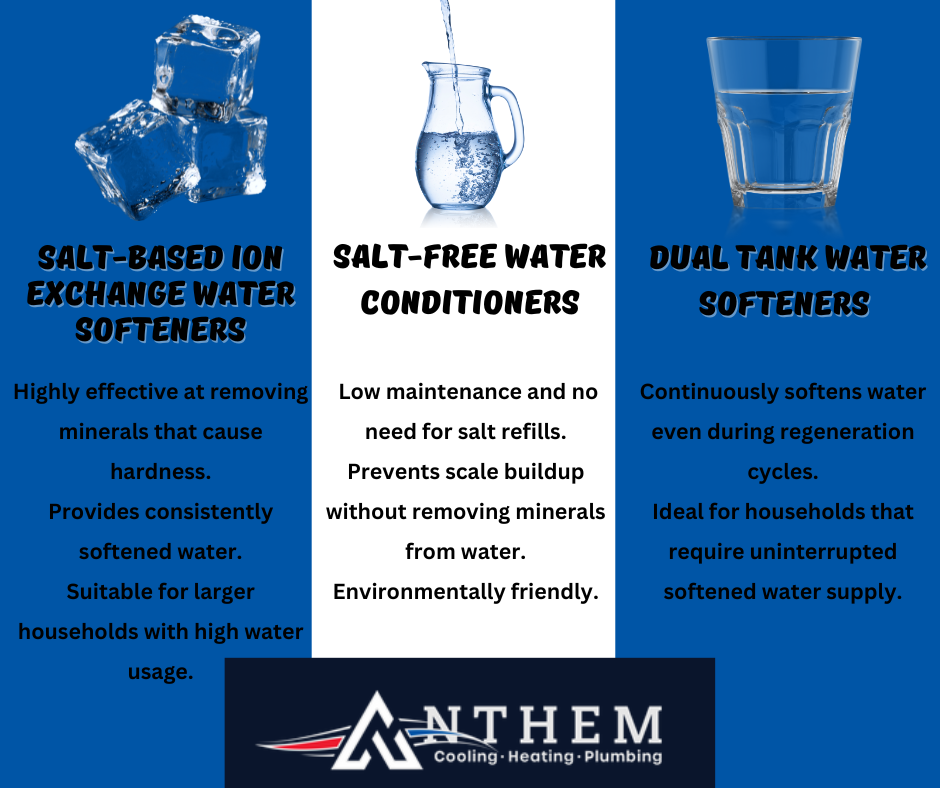
Salt-Based Water Softeners
Say goodbye to scale buildup and hello to smooth, soft water with salt-based water softeners. In the battle to banish tough minerals such as calcium and magnesium, these units serve as the robust warriors. They use a process called ion exchange, where resin beads inside the tank swap out hard minerals for sodium ions.
But remember, these champs need their rest too. The regeneration cycle is when they recharge those resin beads to keep fighting the good fight. This means you’ll occasionally add salt to your system’s brine tank—a small price for protecting your pipes and appliances.
Salt-Free Water Conditioners
If adding salt isn’t your cup of tea, consider a salt-free water conditioner instead. These units don’t remove hard minerals; rather, they change how these minerals behave so they won’t stick to surfaces as scale.
This option is excellent if you’re looking for less maintenance and no extra sodium in your drinking water. However, it’s worth noting that while great for preventing scale buildup on fixtures and appliances, they might not give you that slippery-soft feeling associated with traditional softened water.
Dual-Tank Water Softeners
For homes bustling with activity or large families consuming lots of H2O daily, a dual-tank system could be just what Doctor Plumber ordered. Imagine uninterrupted softening—even during regeneration cycles—thanks to two tanks alternating duties: one working while the other regenerates.
With this configuration, you’re guaranteed an ever-ready stream of soft water, primed for whatever your day throws at it. Whether it’s shower time rush hour or filling up pots for pasta night, you’re covered. So, get ready Coachella Valley residents, because smoother skin, dazzling dishes, and happier hair await.
Selecting the Right Size and Type for Your Home
Choosing a water softener isn’t like picking out new curtains; it’s more akin to selecting the right heart surgeon. You want something that will handle your household’s daily water usage without breaking a sweat, but also won’t be overkill.
Grain Capacity: Matching It to Household Water Needs
Your family size and how much water you all use are crucial factors. A smaller family might get by with a lower grain capacity water softener, while larger households or those with higher daily water usage may need something beefier. Remember, it’s not just about drinking water. Showers, laundry, dishwashing – they all add up.
To stay ahead, begin by scrutinizing your monthly water invoice to discern patterns in usage. Then match this figure against the grain capacity of potential systems.
Daily Water Usage Habits: The Unseen Culprit
It’s easy to underestimate how much our habits impact our needs in terms of a system type and size. If conserving water is important to you or if someone in your home has dry skin issues from hard minerals like calcium and magnesium ions found in hard tap sources—a salt-free option might be worth considering despite their limitations compared to traditional models.
In contrast, homes bustling with activity round-the-clock could benefit from dual-tank systems ensuring uninterrupted supply during regeneration cycles—essential for keeping life flowing smoothly without hiccups related to softening processes.
Budgeting for Your Water Softener System
Deciding on the ideal water softener system is vital for maintaining soft, scale-free water in your Coachella Valley residence, but remember, figuring out how much you’ll need to budget for it holds equal importance. But beyond selecting the perfect model lies another significant consideration: budgeting for your system.
Understanding Upfront Costs
The initial investment in a water softener can vary widely depending on the type you go for. Salt-based systems might be more upfront but offer efficiency in handling hard water. On the other hand, salt-free models present an eco-friendly option with lower maintenance costs but may not fully remove certain minerals. If space and uninterrupted supply are your concerns, dual-tank systems ensure continuous softening but at a higher price tag.
It’s not just about buying; installation charges also play a part. Some setups demand professional help especially if you’re looking at complex configurations or integrating into existing plumbing networks.
Ongoing Maintenance Expenses
Maintenance is where long-term savings kick in. Salt-based units need regular refills of salt and possibly replacement resin beads over time – expenses that add up but are predictable. Conversely, while salt-free conditioners require less intervention since they don’t use salt or undergo regeneration cycles, their efficacy might prompt additional solutions to completely tackle hard water issues.
In essence, whether it’s pondering over grain capacity or deciding between tank types – dual-tank versus single-tank – understanding both immediate and future financial commitments will guide you toward making an informed decision tailored to both your household needs and budget constraints.
Installation Considerations in Coachella Valley
If you’re thinking about getting a water softener system for your home in the sun-soaked expanse of Coachella Valley, there are a few key things to consider. Opting for a water softener transcends mere comfort during your showers; it’s an essential defense against the unyielding assault of hard water on your plumbing and devices.
Space Requirements
First, let’s talk space. Not all homes have a sprawling utility room waiting for new gadgets. Measure twice so you only have to install once. Whether it’s a compact salt-free model or a more substantial dual-tank setup, knowing how much room you’ve got is crucial.
Dual-tank water softeners offer continuous softening—a boon for large households—but they do take up more real estate. On the flip side, portable water softeners could be an excellent option if you’re tight on space but still want to tackle that pesky scale buildup.
Professional Services
Nobody wants their DIY project to turn into an SOS situation—especially when dealing with something as vital as your home’s water supply. In Coachella Valley, where hard minerals like calcium and magnesium love to play havoc with plumbing systems, getting professional help isn’t just advised; it’s essential.
Finding someone experienced with installing various types of systems—from salt-based options known for their efficiency at swapping out hardness ions through ion exchange processes to innovative salt-free conditioners that prevent minerals from sticking without adding sodium—is key. A quick chat with local experts can steer you toward the best choice based on both your household needs and regional considerations such as climate and specific mineral content challenges common in our area.
Conclusion
Choosing a water softener system means stepping up for your home’s health. You’ve learned that hard water is no friend to Coachella Valley homes, causing everything from dry skin to scale buildup.
Tackling this starts with understanding the science behind softening – it’s all about swapping out calcium and magnesium ions for something gentler on your pipes and appliances.
Keep in mind that the effectiveness of a water-softening system varies greatly from one model to another. Whether you lean toward salt-based powerhouses or prefer the eco-friendly route of salt-free conditioners, what matters is matching the system to your specific needs.
In making this choice, consider not just today but tomorrow too. Budget wisely; think about long-term savings over upfront costs. Also, keep in mind the room needed for setup!
To sum up: Know your water, know your options, and make an informed decision. That’s how you win against hard water in Coachella Valley.
Are you looking to ensure your home’s HVAC system runs smoothly year-round without breaking the bank? Look no further! Join Anthem’s exclusive Comfort Club today for just $14.95 a month!
Membership perks include:
2) Bi-Annual Maintenance Visits: Spring AC tune-up & fall furnace check-up. No hassle scheduling – we’ll reach out when it’s time!
Exclusive Discounts: Enjoy 15% off AC & heater repairs, IAQ products, and duct cleanings.
Reduced Service Fee: Pay only $69 for service calls (normally $99).
Priority Scheduling: Guaranteed scheduling within 24 hours for club members.
Priority Service: On sweltering days, your unit becomes our top priority!
Extended Equipment Lifespan: Keep your HVAC system running longer.
Enhanced Energy Efficiency: Save on utility bills with optimized systems.
And more! Don’t miss out on these incredible benefits! Call Anthem at (855) 268-4369 or visit Anthem’s Website to sign up and schedule your estimate today!
Wrestling with how to remove limescale and fix hard water problems in your home can feel like an uphill battle. It’s a common issue, but the good news is, it’s not unbeatable. We’re diving deep into practical solutions that’ll give you back control over your appliances and plumbing fixtures.
Discover how simple kitchen staples, such as lemon juice, vinegar, and bicarbonate of soda, transform into formidable opponents in the battle against tenacious limescale accumulations. From making glass shower doors sparkle to ensuring your water heater runs efficiently—we’ve got tips that work without breaking the bank.
But we don’t stop at removal; prevention is key. Regular maintenance might sound dull, but it’s your best defense against future buildup. Stick around for insights on selecting the right water softener, too—your ultimate weapon in this ongoing fight.
Are you looking to ensure your home’s HVAC system runs smoothly year-round without breaking the bank? Look no further! Join Anthem’s exclusive Comfort Club today for just $14.95 a month!
Understanding Hard Water and Its Effects on Your Home
What Makes Water Hard?
The culprit behind hard water is primarily minerals like calcium carbonate, which sneak into your home’s water supply. As these minerals dissolve, they transform clear water into what we call ‘hard water’. This isn’t just a fancy term; it directly impacts the taste of your coffee and even how soap lathers in the shower.
These pesky minerals don’t stop there. They’re notorious for affecting water quality by leaving behind deposits that can clog pipes and reduce the efficiency of your plumbing fixtures. Imagine taking a shower under a trickle because of reduced water pressure—frustrating, right? That’s hard water at work.
The Toll on Household Appliances
Your washing machine, dishwasher, and especially your hot-water heater suffer silently from hard-water assault. These appliances are where heated elements come into play—and where calcium loves to hang out. Over time, this results in wear and tear that could have been avoided with softer water.
In fact, studies show that 85% of homes in the U.S. grapple with hard water problems leading to quicker depreciation of household appliances. It’s not just about replacing a worn-out washer but also about those increased energy bills due to inefficiency caused by scale buildup inside heating elements.
DIY Solutions for Hard Water Stains and Limescale Deposits
Lemon Juice and Vinegar Magic
When life gives you lemons, use them to combat hard water stains. Combining lemon juice or white vinegar with water creates a potent acidic solution that breaks down stubborn calcium deposits. Simply fill a spray bottle mix with equal parts of either lemon juice or vinegar and water. This DIY solution is not just effective but also eco-friendly.
Spray the mixture generously on affected areas, let it sit for a few minutes, then wipe clean. This remedy shines, especially when tackling the stubborn stains that hard water deposits on glass shower enclosures. Remember, 85% of homes in the U.S. deal with these mineral nuisances because their supply contains high levels of calcium carbonate.
Baking Soda Scrub
If you’re facing tough limescale buildup or soap scum that won’t budge with liquid solutions alone, reach for baking soda. Create a paste by mixing baking soda with a little bit of water and apply it directly onto the problem areas using an old toothbrush or sponge to scrub stubborn stains away gently.
Employing this technique, stainless steel and plumbing components remain unscathed while getting a thorough cleanse due to its gently abrasive quality. Just think about those dishwasher heating elements covered in white scale; they, too, can benefit from this simple yet efficient cleaning hack.
Preventing Limescale Buildup in Your Home
Regular Maintenance is Key
Keeping your home free from limescale involves more than just regular cleaning; it’s a continuous struggle with the challenges posed by hard water. In areas with hard water, faucets can become encrusted with a white film and stubborn deposits that are not only unsightly but can also reduce the efficiency of your appliances. Routine cleaning using simple household items like vinegar or lemon juice helps dissolve these calcium carbonate deposits before they become a problem.
A great way to start is by focusing on the shower head, which often gets overlooked during regular bathroom cleanings. A mix of equal parts water and vinegar soaked overnight can work wonders. Not only does this method prevent limescale buildup, but it also restores your shower head’s flow rate without needing harsh chemicals.
Beyond showers, adopting certain cleaning hacks for routine maintenance across all plumbing fixtures ensures that you’re always one step ahead of limescale accumulation. For instance, wrapping faucet aerators in small bags filled with vinegar solution overnight once every few months will keep them running smoothly and extend their lifespan considerably.
Diligently tackling the challenge of hard water with regular care really makes a difference in maintaining your home’s wellbeing. By incorporating some easy-to-follow strategies into your regular cleaning routine—like those mentioned above—you’ll effectively keep those pesky white marks at bay and ensure that both your plumbing fixtures and appliances last longer.
The Science Behind Water Softeners
Ever wonder why limescale seems to have a vendetta against your toilets, causing those unsightly brown stains and weak flushes? The culprit is hard water. However, don’t despair; water softeners ride to the rescue, altering hard water into its gentler counterpart and thereby extending the life of your dwelling’s plumbing infrastructure.
Types of Water Softeners
Understanding how different models of water softeners work can be a game-changer for your household. Ion exchange softeners swap minerals like calcium and magnesium with sodium or potassium ions, making them the most common heroes in this battle. On the other hand, salt-free conditioners prevent minerals from depositing as scale without removing them, which is ideal for those on low-sodium diets.
Dual-tank softeners come equipped with two resin tanks for uninterrupted service—while one tank regenerates, the other keeps on working tirelessly. And let’s not forget about magnetic or electronic descalers; these innovative devices claim to alter mineral properties through magnetic fields so that they won’t stick around long enough to cause trouble.
Limescale doesn’t stand a chance when up against well-informed homeowners ready to choose their perfect match in a water treatment system.
How to Choose the Right Water Softener for Your Home
Finding a hard water solution that works for your home in Coachella Valley, CA, doesn’t have to be like searching for a needle in a haystack. With the right info and a bit of know-how, you can pick out the perfect water softener without breaking a sweat.
The first step is understanding what makes your water hard. Navigating the turmoil caused by an abundance of calcium and magnesium, which notoriously disrupt both household fixtures and personal comfort, requires a keen understanding. They’re why you might find yourself scrubbing stubborn soap scum off shower doors or dealing with limescale deposits on stainless steel surfaces more often than you’d like.
To get ahead of these issues, consider how much softened water your household needs daily. This isn’t just about quenching thirst; it’s also about running appliances efficiently without them turning into mineral museums. Next up: regeneration style—do you want something manual where you call the shots or an automatic system that takes one thing off your plate? And let’s not forget about salt-based versus salt-free systems—the former swaps out hard minerals for sodium ions while the latter crystallizes minerals so they don’t stick around (literally).
In essence, choosing between water softening technologies boils down to personal preference and specific needs but remember: investing in any system is better than letting those calcium carbonate critters run wild in your pipes.
Cleaning Tips for Specific Areas Affected by Hard Water
Hard water is not just a nuisance; it etches its presence on everything, ranging from the glass doors of your shower to the metallic sheen of your faucets. But fear not. There are tried-and-true ways to combat these pesky deposits.
Sparkling Glass Shower Doors Every Time
If you’ve ever noticed white spots on your glass shower doors, that’s hard water’s calling card. The minerals in hard water, like calcium and magnesium, love to stick around long after the water evaporates. To tackle this head-on, grab a spray bottle and mix equal parts of white vinegar and hot water. This simple yet effective solution cuts through limescale like butter. Just spray generously and let it sit before wiping clean with a soft cloth.
For those stubborn stains that seem more permanent than temporary guests, soak paper towels in the vinegar solution and plaster them onto the affected areas. Let them work their magic for an hour or so before removing them – you’ll be amazed at how easily those marks disappear.
Maintaining gleaming surfaces isn’t rocket science, but knowing what works makes all the difference. Regularly using these methods will ensure that hard water stains don’t stand a chance against your cleaning prowess.
Conclusion
After diving into the methods of eliminating limescale and addressing hard water issues, you’re now equipped with knowledge on using lemon juice, vinegar, and baking soda to combat those persistent mineral build-ups—highlighting that preventing them is equally important as getting rid of them.
Remember this: Prevention is just as crucial as removal. Regular maintenance isn’t just advice; it’s a strategy for keeping things running smoothly.
And let’s not forget about water softeners. They’re more than an investment; they’re a commitment to safeguarding your appliances and plumbing fixtures long-term.
In every spray bottle mix or scrub session lies the power to transform hard water chaos into cleanliness and efficiency. Take these insights, apply them diligently, and watch as your home transforms—one faucet at a time.
Experience Year-Round Comfort with Anthem’s Comfort Club!
Are you looking to ensure your home’s HVAC system runs smoothly year-round without breaking the bank? Look no further! Join Anthem’s exclusive Comfort Club today for just $14.95 a month!
Membership perks include:
2) Bi-Annual Maintenance Visits: Spring AC tune-up & fall furnace check-up. No hassle scheduling – we’ll reach out when it’s time!
Exclusive Discounts: Enjoy 15% off AC & heater repairs, IAQ products, and duct cleanings.
Reduced Service Fee: Pay only $69 for service calls (normally $99).
Priority Scheduling: Guaranteed scheduling within 24 hours for club members.
Priority Service: On sweltering days, your unit becomes our top priority!
Extended Equipment Lifespan: Keep your HVAC system running longer.
Enhanced Energy Efficiency: Save on utility bills with optimized systems.
And more! Don’t miss out on these incredible benefits! Call Anthem at (855) 268-4369 or visit Anthem’s Website to sign up and schedule your estimate today!
Let’s face it, a clogged drain can throw a wrench in your day faster than you can say “plumber.” That’s why knowing how to clean drains in your home is as essential as mastering the perfect grilled cheese sandwich. It’s not just about getting rid of that gunk; it’s about reclaiming your sanctuary from the clutches of stubborn blockages and foul odors.
You’ll get hands-on with baking soda and vinegar for an eco-friendly fix, learn how boiling water might be all you need for minor troubles, and when it’s time to call in reinforcements like a trusty plunger or barbed tool. From kitchen sink dramas to bathroom battles, this guide has got you covered.
And let me tell you—once those drains are clear? You’ll feel like the ruler of your castle again. So roll up those sleeves; we’re diving into drain maintenance head-first.
Experience Year-Round Comfort with Anthem’s Comfort Club!
Are you looking to ensure your home’s HVAC system runs smoothly year-round without breaking the bank? Look no further! Join Anthem’s exclusive Comfort Club today for just $14.95 a month!
Table Of Contents:
The Essential Guide to Drain Cleaning in Coachella Valley Homes
The Power of Baking Soda and Vinegar in Drain Maintenance
Utilizing Boiling Water for Immediate Drain Relief
Mechanical Tools for Removing Stubborn Clogs
Optimizing Your Kitchen Drain Cleaning Routine
Garbage Disposal Cleaning with Natural Ingredients
Preventing Food Particles from Clogging Your Sink
Clearing Bathroom Drains Like a Pro
Eliminating Soap Scum Buildup Effectively
Removing Hair Clogs from Bathroom Drains
Advanced Solutions for Serious Drain Clogs
Mechanical Tools for Removing Stubborn Clogs
Cleaning Products That Pack a Punch
Tackling Kitchen Sink Drain Woes
Conclusion
The Essential Guide to Drain Cleaning in Coachella Valley Homes
Keeping your drains clean is not just about avoiding inconvenience; it’s a battle against the unseen buildup that can lead to major plumbing maintenance down the line. Think of your kitchen sink drain and bathroom sink as gateways in an underground city, where everything from soap scum to food particles has the potential to create traffic jams. And let’s be honest, nobody likes a slow-draining sink or—worse yet—a completely clogged one.
The Power of Baking Soda and Vinegar in Drain Maintenance
Baking soda isn’t just for making volcanoes with kids—it’s also great at keeping drains clear without resorting to store-bought drain cleaners that often contain harsh chemicals. A half-cup baking soda chased by a half-cup vinegar may sound like an old wives’ tale, but trust me when I say this trick will have more impact on clearing minor clogs than most fairy godmothers would on pumpkins after midnight. Plus it helps eliminate odors leaving behind nothing but freshness—and who doesn’t want their home smelling less like stinky drains?
Utilizing Boiling Water for Immediate Drain Relief
We all know hot water melts butter faster than cold water—same goes for greasy buildups lurking within our drain lines. Pour boiling water slowly into the offending drainage opening once weekly as part of your cleaning routine. It won’t fix every problem—but consider it preventive medicine for sinks everywhere.
Mechanical Tools for Removing Stubborn Clogs
Sometimes stubbornness requires equally stubborn solutions—which is why mechanical tools were invented. From plunger cups designed specifically for sinks (because yes—they differ from toilet plungers), to barbed plastic cleaning tools meant solely for fishing out hairballs bigger than any cat could cough up—the right tool makes all the difference between defeat and victory over sewer clogs.
Key Takeaway:
Keep your drains clear and smelling fresh with simple DIY tricks: use baking soda and vinegar for fizzing action against minor clogs, pour boiling water weekly to melt grease, and don’t shy away from mechanical tools to tackle tougher blockages.
Optimizing Your Kitchen Drain Cleaning Routine
Keeping your kitchen drains in tip-top shape doesn’t just prevent the inconvenience of clogs; it also helps you maintain a clean and welcoming space where foul odors are shown the door. Let’s break down how to keep those pipes pristine.
Garbage Disposal Cleaning with Natural Ingredients
The garbage disposal is often the unsung hero of a clean kitchen sink, but neglect can turn it into a villain brewing odors. Natural ingredients are here to save the day. A dynamic trio that works wonders consists of ice, coarse salt, and lemon peels. Tossing these items into your disposal creates an abrasive action that scrubs away grime while leaving behind a fresh citrus scent.
To start this simple routine, feed your hungry disposal some ice cubes followed by half a cup of coarse salt. The crunching action sharpens blades and dislodges gunk clinging onto them like stubborn barnacles on a ship’s hull. Then let zesty lemon peels chase after them—you’ll get both spick-and-span results and environmental brownie points for using biodegradable materials. Finish with cold water to flush everything through—it’s as easy as pie.
Preventing Food Particles from Clogging Your Sink
Your mom probably told you not to put grease down the drain—and she was right. Grease solidifies upon cooling and acts like glue for food particles creating one big messy clog party in your sink drain.
To tackle this issue without breaking out heavy artillery (or calling in reinforcements), adopt two simple habits: use strainers religiously (yes they’re more than shiny sink accessories), and clear plates thoroughly before washing dishes or loading up the dishwasher—a quick scrape does wonders at keeping major blockage culprits at bay.Additionally, make running hot water part of your dishwashing ritual post-mealtime; it keeps oils liquid so they don’t stage revolts inside your pipes later on.
A stitch in time saves nine—that adage holds true when we talk about maintaining our drains regularly rather than waiting for problems to arise. Every few weeks sprinkle half a cup of baking soda followed by half a cup of white vinegar down each drain; let this fizzy duo dance their chemical jig which helps nix potential buildups lurking within dark pipe corners (Note: always follow up with boiling water poured slowly).
Key Takeaway:
Keep your kitchen drains happy with ice, salt, and lemon peels for a fresh-smelling garbage disposal. Prevent clogs by using strainers and scraping plates before washing up. For routine care, try baking soda and vinegar—natural heroes against buildup.
Clearing Bathroom Drains Like a Pro
Bathroom drains have it tough, don’t they? Between soap scum and hair, these unsung heroes of hygiene can get clogged more often than we’d like. But fear not—armed with some household staples and a bit of know-how, you’ll be saying goodbye to those pesky blockages in no time.
Eliminating Soap Scum Buildup Effectively
Soap scum is that stubborn residue that sticks around after all the bubbles are gone. It’s like the party guest who just won’t leave—it clings onto your tub drains and bathroom sink causing water to back up faster than rush-hour traffic. The key here is regular maintenance; this doesn’t mean reaching for harsh chemicals though. A simple duo can work wonders: baking soda followed by white vinegar. Here’s how:
Pour half a cup of baking soda down the drain.
Follow it with half a cup of white vinegar—the two will react, breaking down gunk without any fuss or muss.
Cover with a wet cloth to contain the magic inside your pipes for about thirty minutes then rinse away with hot water from your trusty tap.
This fizzy little concoction isn’t just effective at banishing buildup but also kind on our planet too. No sinister side effects here; just clear pipes ready for whatever comes their way next.
Removing Hair Clogs from Bathroom Drains
We’ve all been there—you’re cleaning out the shower and suddenly you’re face-to-face with what looks like Cousin Itt from “The Addams Family.” Removing hair clogs doesn’t have to turn into an episode straight out of ‘Tales From The Crypt’ though.
The first move in this chess game against bathroom drains is using your hands (or tweezers) to remove any obvious offenders lurking near the surface—think less mad scientist experimenting on unknown species and more treasure hunter uncovering relics one strand at a time. For those deeper-rooted issues where manual extraction seems impossible (and let’s face it – downright unpleasant), reach for something I call ‘the plunger dance’:
Gently place your sink plunger over the offending drain opening making sure you’ve got good suction seal action going on.
Add enough warm water into said sink/tub so that rubber part is submerged – think cozy bath levels rather than full-on tsunami waves crashing overboard here folks.
Make sure to grip the handle tightly and plunge with strong, quick motions. Aim to keep the mess contained—trust me, you’ll appreciate it later.
Key Takeaway:
Blast away soap scum with a baking soda and vinegar mix, then tackle hair clogs in your bathroom drain by first using hands or tweezers, followed by an enthusiastic ‘plunger dance’ for deeper blockages.
Advanced Solutions for Serious Drain Clogs
Sometimes a clog won’t budge with the old baking soda and vinegar trick, or even after wrestling it with a plunger. That’s when you know it’s time to bring out the big guns. Here are some advanced techniques that can help clear even the most stubborn drain clogs.
Mechanical Tools for Removing Stubborn Clogs
If your sink is still draining slowly despite your best efforts, mechanical tools might be just what you need. A cup plunger could do the trick for minor blockages—just make sure to use it correctly by creating a tight seal and giving several firm plunges. But sometimes, that’s not enough.
For more challenging situations, barbed plastic cleaning tools can reach deep into drains to snag hair and other debris that may be causing trouble down there. They’re easy to use; just insert them into the drain opening and pull back out hopefully with all of those pesky clog culprits attached.
If neither plungers nor barbed cleaners get results, plumbing maintenance snakes—also known as augers—are another step up in tackling tough jobs like sewer clogs without needing professional help right away.
Cleaning Products That Pack a Punch
We’ve all heard warnings about harsh chemicals damaging pipes—and they’re valid—but certain products on the market are designed specifically for safe yet powerful action against serious drain cleaner challenges. Look for enzyme-based cleaners which work over time to break down organic material inside pipes rather than blasting through them at once.
The key here is patience: these aren’t quick fixes but long-term solutions that will keep kitchen sink drains running smoothly well after their first application if used as part of regular cleaning routines alongside hot water flushes now and then.
Tackling Kitchen Sink Drain Woes
Your clean kitchen should include clean drains too. Food particles often lead directly toward blockages so always scrape dishes before washing them—it’s simple preventive care along with using strainers during dishwashing sessions prevents food from getting lodged in places where they shouldn’t be hanging around anyway.
The Environmental Protection Agency recommends careful disposal of grease, ensuring we don’t pour boiling water laden with oil straight down our sinks—a common mistake leading towards thickened gunk lining our pipes.
Key Takeaway:
When baking soda and plunging fail, try mechanical tools like a cup plunger for minor clogs or plumbing snakes for tougher ones. For a safer chemical fix, enzyme-based cleaners offer long-term results. Prevent kitchen sink clogs by scraping dishes and using strainers; tackle bathroom drain woes with regular cleaning to combat soap scum and hair build-up.
Conclusion
Now you know how to clean drains in your home, a game-changer for any homeowner. Keep those kitchen and bathroom sinks flowing smoothly with regular baking soda and vinegar treatments.
Remember: pour boiling water down the drain regularly, it’s an easy win against minor clogs. Don’t forget that plunger—simple but mighty when you’re up against stubborn blockages.
Maintain and strain; keeping debris out is half the battle won. Ice, salt, lemon peels—they’re not just for cocktails; they keep your garbage disposal fresh too.
Tackle soap scum without fear and send hair clogs packing with minimal fuss. And if all else fails? Know when to level up to mechanical tools or call in the pros for serious sewer clogs.
Clean drains are within reach! Armed with these tips, embrace your inner DIY spirit and banish drain dramas from your domain!
Experience Year-Round Comfort with Anthem’s Comfort Club!
Are you looking to ensure your home’s HVAC system runs smoothly year-round without breaking the bank? Look no further! Join Anthem’s exclusive Comfort Club today for just $14.95 a month!
Membership perks include:
2) Bi-Annual Maintenance Visits: Spring AC tune-up & fall furnace check-up. No hassle scheduling – we’ll reach out when it’s time!
Exclusive Discounts: Enjoy 15% off AC & heater repairs, IAQ products, and duct cleanings.
Reduced Service Fee: Pay only $69 for service calls (normally $99).
Priority Scheduling: Guaranteed scheduling within 24 hours for club members.
Priority Service: On sweltering days, your unit becomes our top priority!
Extended Equipment Lifespan: Keep your HVAC system running longer.
Enhanced Energy Efficiency: Save on utility bills with optimized systems.
And more! Don’t miss out on these incredible benefits! Call Anthem at (855) 268-4369 or visit Anthem’s Website to sign up and schedule your estimate today!
A leaky pipe doesn’t just mean a call to the plumber—it’s an invitation to understand the secret life behind our walls.
Glimpse the unseen realm of home plumbing and get ready for a surprise. Think of your house like a living creature: arteries supplying water, veins draining it away, and lungs breathing through vents.
You’ll discover why that cold water feels extra refreshing on hot days and how your flushing toilet is more sophisticated than you think. Get ready for some ah-ha moments as we unravel common mysteries from bursting pipes to silent leaks that can turn any weekend into an unexpected adventure.
Experience Year-Round Comfort with Anthem’s Comfort Club!
Are you looking to ensure your home’s HVAC system runs smoothly year-round without breaking the bank? Look no further! Join Anthem’s exclusive Comfort Club today for just .95 a month!
Ever wonder how the water in your morning shower gets to you so crisp and refreshing? Well, it’s all thanks to a symphony played by the house plumbing orchestra—where every pipe and valve works in harmony. So grab a backstage pass; we’re exploring the hidden world behind your walls.
Understanding Supply Lines and Water Flow
Fresh water enters your abode through a main water supply line—a lifeline that brings fresh water from either municipal sources or private wells. This life-giving flow travels via supply pipes made typically of copper or PEX, zigzagging its way beneath floors and inside walls with one mission: deliver clean water wherever it’s called upon. At each stop—be it the kitchen sink or flushing toilet—the cold water stands ready for duty while hot companions await their turn from within insulated cylinders known as heaters.
This domestic journey begins when someone turns on a tap, signaling demand. The pressure in these lines makes sure that even if you live on the second floor, gravity won’t keep you thirsty—or dirty—for long. From washing machines humming quietly on laundry day to garden hoses fueling backyard adventures, this intricate network ensures running water is always at hand.
Waste Drains and Vents Explained
Now let’s talk about what happens after the magic fades—that is when clean becomes waste. Drainage systems are like diligent sentinels ushering away used H2O along with any other unwanted souvenirs from our daily lives (think soap suds). They send everything down through larger pipes until reaching either septic tanks tucked away underground or directly into municipal sewers.
Your home breathes too. Those not-so-pleasant odors trying to claw their way back up? That’s where vents step in; they make sure sewer gases get an express ticket straight up to roof vents instead of lounging around your living room. Waste drains plus vents equals no nasty surprises during dinner parties—it’s basic math really.
If Goldilocks were here inspecting pipes rather than porridge temperatures, she’d say “just right” sizing matters big time for preventing common plumbing problems like clogs or slow drainage—not too wide nor narrow does the trick perfectly. You see fixtures have appetites specific for certain sizes: take toilets gobbling gallons per flush versus tiny faucet streams tickling toothbrush bristles—they’re different beasts needing matching pipelines lest chaos ensues across your serene indoor savannahs.
Key Takeaway:
Ever wondered about the journey of water to your faucet? It’s all thanks to a network of supply lines and valves ensuring fresh H2O arrives on demand. And after you’re done, waste systems whisk it away efficiently—out of sight but always working hard for a smoothly running home.
Water Pressure and Its Role in Your Plumbing
Think of water pressure as the unsung hero in your home’s plumbing saga. It’s what gets that refreshing splash to your face every morning when you turn on the faucet. But just like any good story, too much or too little pressure can lead to a plot twist no homeowner wants.
From Street to Faucet – The Journey of Water Pressure
The tale begins at the mains supply, where incoming water is amped up by the city pumps—a necessary boost for its travels. As it moves through the main water supply pipes, this pressurized lifeline snakes towards your abode with one mission: bring fresh water wherever needed.
The moment it reaches your place, things get real—pressure needs precision. Too high? You might be looking at burst pipes and an indoor fountain nobody asked for. Just right? Ah. That’s where everything sings—the shower feels heavenly; washing machines hum contentedly; flushing toilets don’t mutter protests.
To hit that sweet spot between 40-60 psi (that’s pounds per square inch for our non-plumber friends), savvy homeowners keep an eye on their valve located usually where cold water enters their sanctuary from street-side chaos.
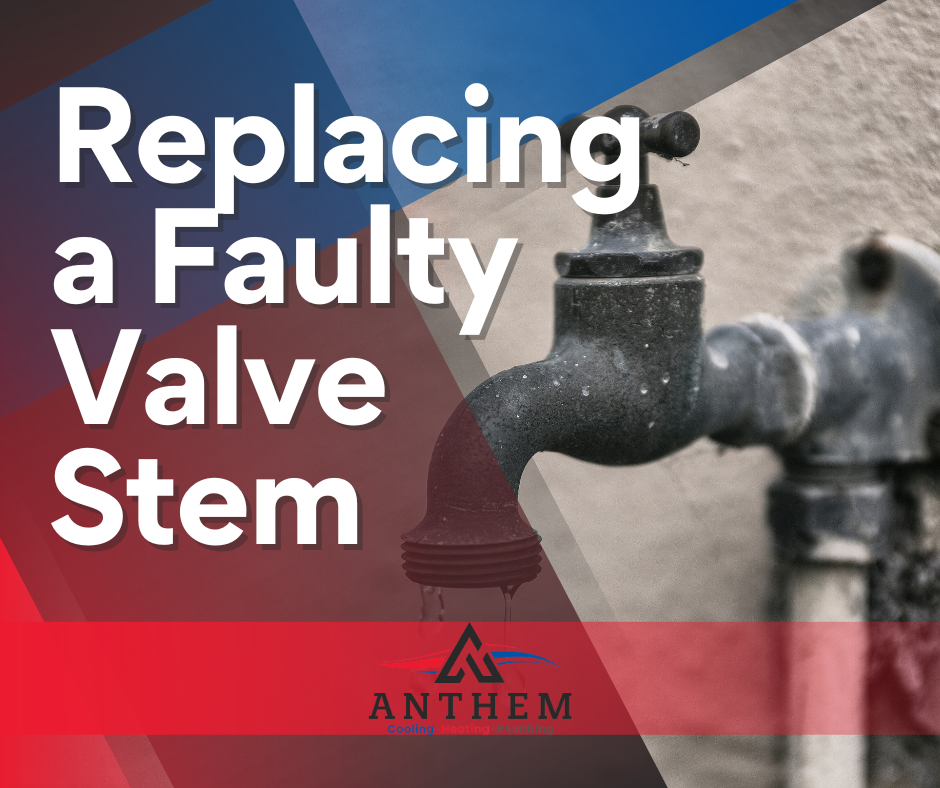
Troubleshooting Common Issues Related to Water Pressure
Sometimes though, even heroes falter; maybe you’ve noticed taps gossiping with drips instead of gushing forth or showers sulking rather than spraying with gusto—that could mean trouble brewing underground or within walls. Don’t fret. A trusty pressure gauge attached to a spigot can help diagnose if your system’s losing steam and needs pipe cleaning—or perhaps there are deeper issues at play calling for professional eyes.
If whispers around town suggest increasing numbers facing low-pressure woes—you’re not alone. Drains clear but sinks still sigh sadly? Could be time for strainers to ensure nothing nefarious blocks those precious pathways keeping life flowing smoothly inside the kitchen’s plumbing arenas.
Key Takeaway:
Water pressure is the lifeblood of your home’s plumbing, crucial for that perfect shower and functioning appliances. Keep it between 40-60 psi to avoid mishaps like burst pipes or weak flows.
If you spot a drop in pressure, don’t panic—check with a gauge or call a pro.
Hot Water Supply and Heating Systems
The Central Role of Water Heaters
Ever wondered why you can enjoy a hot shower at the twist of a knob? It’s all thanks to your home’s water heater. This unsung hero works tirelessly, ensuring that when you turn on the tap for a steamy shower or run your washing machine, hot water is always on demand. But how does it work? Well, think of your water heater as a tea kettle for the entire house. Just like heating up water for tea, the water heater warms up cold water from your main supply using gas or electricity.
In essence, this trusty appliance takes in cold water through dedicated supply pipes and heats it using either an electric element or gas burner—kind of like turning on the stove to warm soup when hunger strikes. Once heated to just the right temperature—which should be around 120 degrees Fahrenheit for safety and efficiency—the now-hot water waits patiently in its tank until called upon.
Your morning routine probably wouldn’t be quite as refreshing without this key component working correctly. So next time you’re enjoying that cozy warmth enveloping you in your shower or watching suds swirl away down the drain after doing dishes with warm running water; remember there’s good reason to appreciate what goes on behind those closet doors where most heaters live quietly out of sight.
Maintaining Your Hot Water System for Efficiency
Having a dependable system is similar to owning an efficient car; it will get you where you need to go (or in this instance provide continuous hot showers) without any issues along the way. To keep things flowing smoothly—and prevent dreaded icy spurts mid-shampoo—you’ll want regular check-ups on both pressure relief valves and thermostats.
Think about maintenance tasks as spa days for your system; they are essential not only because they prolong its life but also help ensure every drop coming out steaming has passed muster quality-wise—a necessity if avoiding common plumbing problems such as sediment build-up sounds appealing. Regular flushing helps keep those internal components clean which allows efficient operation year-round so no surprise cold snaps occur during winter months—or worse yet burst pipes due to neglect.
Beyond basic care though lies another secret weapon against inefficiency: insulation jackets with specially designed wraps meant to encase tanks thereby reducing heat loss dramatically over time meaning energy bills stay lower than expected.
Key Takeaway:
Just like a tea kettle, your water heater is the unsung hero that delivers hot water on demand for showers and chores. Regular maintenance checks and insulating your tank are key to ensuring efficient operation and preventing plumbing mishaps.
Shutting Off Your Water Supply in Emergencies
You never know when a plumbing surprise will hit you like a cold shower on Monday morning. Maybe it’s a burst pipe or the dreaded realization that your toddler thinks flushing toys is a new game. Either way, knowing how to slam the brakes on your water supply can save you from turning your basement into an unwanted indoor pool.
Locating Main Shutoffs for Quick Access
Sure, we all love hide and seek, but not when it comes to finding the main valve during an emergency. This elusive little hero is often hiding in plain sight; perhaps chilling out near where the main water line enters your home or taking cover in a utility closet. If it’s playing hard-to-get, check around areas with easy access from street level—think basements or garages close to front yards.
Once you’ve spotted this trusty shutoff valve—a gatekeeper of sorts—it takes just one firm twist clockwise (righty-tighty.) and voila. You’ve effectively cut off the entire house’s water supply, buying yourself some precious time before calling reinforcements (i.e., professionals who help customers with common plumbing problems).
Tackling Specific Fixtures Like A Pro
We get it: sometimes there’s no need for overkill. So if only one appliance has gone rogue—the washing machine morphing into Old Faithful geyser imitation—fear not. Most modern marvels come equipped with their own shutoff valves located behind them or beneath sinks (look at you being sneaky, kitchen sink). Twist these bad boys firmly closed and breathe easy knowing you’ve prevented any more H20 hijinks without leaving the whole house high and dry.
If panic sets in because everything seems submerged under pressure-packed streams of cold water—or worse yet warm water—and visions of costly damage flood your mind faster than actual floods could ever hope to do… Remember those fixture-specific shutoff valves? They’re not just there for show—they’re practical magic waiting for moments like these.
Key Takeaway:
When plumbing chaos strikes, know how to quickly shut off your water. Find the main valve for major mishaps or use fixture-specific valves for smaller issues—either way, act fast to prevent a home flood.
Septic Systems vs. Municipal Sewer Connections
Ever wonder where everything goes after the flush? Waste management is typically divided between septic tanks and municipal sewers, two distinct yet essential solutions. They’re like the Batman and Superman of sanitation—both heroes in their own right, but with very different methods.
How Septic Tanks Function in Rural Homes
Rural living has its perks, but it also means getting down to business with a septic tank system. It’s not as simple as a magic disappearing act; there’s a method to this madness. A septic system is pretty much your personal on-site sewage treatment facility. The process starts when wastewater from your home flows into the tank, which might be buried somewhere you’d rather not think about while sipping lemonade on your porch.
In these subterranean fortresses for solids and liquids alike, heavy stuff sinks to form sludge while lighter substances float up as scum—the cream of the crop that nobody wants. Bacteria get busy breaking things down until what remains is mostly water—with a hint of unwanted extras—and this gets released through drainage fields into Mother Nature’s big filtration system: soil itself.
The Process of Municipal Wastewater Treatment
If you’re more city mouse than country squirrel, then chances are your waste heads off on an epic journey at a municipal sewer system. This isn’t some wild ride at an amusement park; it’s serious business where every drop matters. Here’s how it unfolds: once wastewater goes down your drain or toilet (goodbye.), it travels via underground pipes until reaching colossal community-sized facilities dedicated entirely to cleaning up our collective messes—a.k.a., wastewater treatment plants.
Municipalities take charge here by guiding our erstwhile dirty water through several stages designed to clean house—or clean water—in style before sending it back out into rivers or oceans like well-groomed guests leaving a swanky soiree.
No one enjoys talking trash—or better yet, sewage—but knowing how these systems work can save both headaches and money when plumbing problems arise because knowledge truly is power when dealing with burst pipes or other common plumbing issues related to waste disposal systems, whether they’re operated by municipalities or managed independently within homes using septic tanks across rural expanses.
Key Takeaway:
Flush with curiosity about where your waste goes? Septic tanks are the lone rangers of rural sewage treatment, while municipal sewers handle city slickers’ wastewater. Know your system to dodge plumbing woes.
Rainwater Management and Its Impact on Plumbing
Ever seen a garden blooming after the rain, looking like it’s throwing a party for its plant buddies? That’s because water is life – but only when it stays where we want it. When rainwater gets too cozy with your home’s foundation, though, you’ve got an unwanted guest that could crash the whole place.
Gutters and Downspouts – Your First Line of Defense Against Water Damage
Think of gutters as your home’s own personal bouncers. They scoop up all that sky juice before it puddles around your house’s precious walls. Then there are downspouts. Without them, let me tell you; basements would be more like indoor swimming pools—minus the fun floats.
A well-oiled gutter system sends gallons upon gallons cascading away from your domicile—and here’s a splashy stat: in just one storm, about 14 inches of rain can come thundering off an average roof. Now picture that deluge heading straight for your abode without any redirection—a true horror story.
Learn about the importance of gutters in directing rainwater safely away from your home’s foundation
You wouldn’t play darts blindfolded and hope to hit bullseye. Similarly, aiming runoff right into purpose-built pathways makes good sense—it avoids soaking soil near foundations which might otherwise invite leaks or cracks over time. It takes finesse and precision planning akin to hitting 15 consecutive perfect throws, keeping every drop under control so they don’t start tearing things apart underground.
The thing is folks often overlook their hardworking gutters until something goes wrong—like forgetting how much you rely on coffee until Monday morning rolls around sans a caffeine fix. But imagine this number: almost 16 million homes suffer water damage yearly due to ignored drainage systems gone rogue during storms.
Maintaining Your Rainwater Management System Keeps You Dry
If maintaining isn’t quite as thrilling as binge-watching mystery shows—who done flooded my basement? — think again. Cleaning out leaves may not solve whodunits but will prevent real-life cliffhangers involving insurance claims or emergency repairs caused by clogged pipes letting loose within wall cavities (now there’s some drama).
Plop strainers atop drains—they’re tiny heroes snagging debris before mischief occurs inside channels beneath shingles’ shadows while ensuring steady flow through seasons’ symphony (or cacophony) of weather tunes played overhead. Don’t wait till problems bubble up and become headaches; proactively place these guardians in your gutters to prevent clogs from rain, leaves, or anything else nature throws at them.
Key Takeaway:
Just like a garden thrives after rain, your house can too with the right defense—gutters and downspouts. They’re not just there for looks; they guide rain away from your foundation, preventing water damage that could lead to bigger headaches.
Keep those gutters clean and fitted with strainers to avoid clogs. It’s less about mystery shows and more about dodging real-life dramas of insurance claims or emergency repairs caused by rogue drainage systems.
Conclusion
Your home plumbing is the circulatory system that keeps your household functioning. How home plumbing works isn’t just about pipes and pressure; it’s understanding the lifeblood of your household.
Remember, supply lines bring fresh water in while waste drains whisk dirty water away. Keep an eye on pipe sizes—they matter more than you think for everything from a flushing toilet to running your washing machine smoothly.
Maintain that balance—good water pressure means stress-free showers but knowing how to handle emergencies like burst pipes can save the day. And don’t forget, hot or cold, water needs efficient heating systems to keep those warm showers coming.
Last up: be wise with waste management whether you’re connected to municipal sewers or relying on septic tanks. It all flows together into one coherent system—your home’s health depends on it.
Experience Year-Round Comfort with Anthem’s Comfort Club!
Are you looking to ensure your home’s HVAC system runs smoothly year-round without breaking the bank? Look no further! Join Anthem’s exclusive Comfort Club today for just $14.95 a month!
Membership perks include:
2) Bi-Annual Maintenance Visits: Spring AC tune-up & fall furnace check-up. No hassle scheduling – we’ll reach out when it’s time!
Exclusive Discounts: Enjoy 15% off AC & heater repairs, IAQ products, and duct cleanings.
Reduced Service Fee: Pay only $69 for service calls (normally $99).
Priority Scheduling: Guaranteed scheduling within 24 hours for club members.
Priority Service: On sweltering days, your unit becomes our top priority!
Extended Equipment Lifespan: Keep your HVAC system running longer.
Enhanced Energy Efficiency: Save on utility bills with optimized systems.
And more! Don’t miss out on these incredible benefits! Call Anthem at (855) 268-4369 or visit Anthem’s Website to sign up and schedule your estimate today!
You’re ready for a relaxing day tending to your garden, hose in hand, but instead of watering the plants, you find yourself standing in a puddle. Your outdoor faucet has sprung a leak – again. I’ve been there; wrestling with pliers and washers on what was supposed to be my day off. It’s enough to make anyone throw in the towel.
Fixing A Leaking Outdoor Faucet, it sounds like quite the chore, right? But stick with me—what if I told you that by tackling this head-on, not only will you save water and protect your home from damage but also regain that sense of accomplishment?
In just a few short steps—armed with some basic tools—you’ll learn how easy it is to nip those pesky leaks in the bud once and for all. Say goodbye to slow drips and the annoyance they bring. Get ready, because you’re about to become your home’s plumbing hero.
Experience Year-Round Comfort with Anthem’s Comfort Club!
Are you looking to ensure your home’s HVAC system runs smoothly year-round without breaking the bank? Look no further! Join Anthem’s exclusive Comfort Club today for just 14.95 a month!
You’ve got a leaky outdoor faucet and it’s driving you nuts. It’s like that one person at the party who won’t stop talking about their cat—annoying, persistent, and soaking everything in sight. Let’s tackle this drip-by-drip saga by spotting the tell-tale signs of when your outdoor spigot is crying for help.
When Water is Turned On
Say your faucet only leaks when you crank it on to water those thirsty petunias—that’s a clue Sherlock Holmes would be proud of. This usually screams “internal issues,” such as trouble with the stem packing or washer inside that old faithful hose bibb. You see, stem packings and washers are like bouncers at a club; they keep the unwanted from sneaking past when they shouldn’t.
If these components wear out, which happens more often than we’d like thanks to time or high water pressure, then bam. You get an unwanted water show every time you turn on that tap.
Leak Location Matters
Finding out whether your leaking outdoor faucet has decided to give up around its handle or from its spout will save you from playing eenie-meenie-miny-mo with repair methods later on. A leak frolicking around the handle area might point towards a faulty packing nut—a little tightening here can sometimes do wonders if it feels loose.
In contrast, if there’s a slow drip coming right from where the water should flow (the spout), well buddy, looks like we’re dealing with worn-out washers most likely caused by mineral deposits building up over time—or maybe even damage to something called the valve seat (not something you sit on but equally important).
No matter what kind of wet situation you’ve found yourself in though—a dripping outdoor faucet left unchecked can cause some real headaches including significant water waste, not to mention potential serious water damage to your home’s foundation if ignored too long.
Key Takeaway:
Got a leaky outdoor faucet? It’s more than just an annoyance—it hints at internal issues like worn-out stem packings or washers. Leaks from the handle could mean a quick fix by tightening the packing nut, but water dripping from the spout often signals deeper problems with washers or valve seats. Don’t ignore it; that drip can lead to costly damage.
Tools and Supplies for Repairing Your Leaking Outdoor Faucet
Gathering your gear before tackling a faucet repair is like prepping for a kitchen recipe—you want everything on hand so you’re not scrambling mid-task. A smooth fix starts with the right tools.
The Essentials List
First up, grab an adjustable wrench; it’s as essential as salt in cooking. Next, enlist a trusty screwdriver to help you pry off stubborn caps or unscrew any pesky parts holding your project hostage.
You’ll also need replacement parts—a worn washer can cause quite the commotion with its incessant dripping. While you’re at it, pick up some stem packing because no one likes a handle that weeps more than an onion-chopping chef.
Last but certainly not least, if your faucet has seen better days, it might be time for a washer assembly overhaul or even swapping out the whole valve stem setup. But remember to measure twice and buy once; getting the correct replacement parts saves another trip to the local hardware store where everyone knows you by name…and plumbing woes.
Now let’s get practical – leaks are no joke. Left unchecked they can lead to water waste equivalent to leaving your garden hose running while taking a weekend getaway – yikes. And don’t get me started on potential water damage; think of all those hard-earned dollars slipping through cracks along with every slow drip.
To ensure victory over vexing leaks:
Lay out all your tools within easy reach because doing The Twist every two minutes isn’t fun unless Chubby Checker’s playing.
If frost-proof faucets are giving you chills down your spine just thinking about them – breathe easy knowing that usually replacing their washers should do the trick nicely without having to replace the entire unit (phew.).
In case rubber washers have gone harder than stale bread — simply swap ’em fresh ones from a hardware store kit designed specifically for this purpose.
Key Takeaway:
Gather your tools and replacement parts before diving into faucet repair to avoid mid-task mayhem. Think of it like having all ingredients ready before you start cooking.
Shutting Off the Water Supply Before Repairs
Imagine your outdoor faucet is like a mini Niagara Falls, gushing out water when all you wanted was to fill up the kiddie pool. To stop this aquatic spectacle and get down to business fixing that leaky spout, you’ve got to cut off its lifeline—the water supply.
Accessing the Shutoff Valve
Sneaking around in your basement or crawlspace might feel like a secret spy mission, but it’s just part of finding your main water shutoff valve. You’ll want to give that valve a firm twist clockwise—think “righty-tighty”—and watch as peace is restored and the risk of turning your yard into an accidental swamp decreases dramatically.
If you’re feeling lost on where this sneaky shutoff resides, take heart. It’s usually hanging out near where the water pipe enters your home. Sometimes it can be near the water meter.
Key Takeaway:
When your outdoor faucet won’t quit, remember: Shutting off the water supply is step one. Find that main valve, usually near where water enters your home or by the meter, and twist it right to stop the flow. It’s a big move for a small leak but saves gallons of waste.
Step-by-Step Washer Replacement Guide
1. Identify the Culprit Behind Faucet Leaks
Check if your outdoor spigot has turned into a mini fountain or if there’s just a pesky leak at the handle when water pressure rises as you turn it on. A worn washer often causes leaks straight from the spout—a clear sign it’s time for faucet washer replacement.
2. Gather Your Tools Like You Mean Business
No one brings a knife to a gunfight—and no one should start repairs without their trusty adjustable wrench and screwdriver by their side either. Make sure these essentials are within reach before getting down to business on that stubborn hose bibb.
You’ll also need new washers handy as well as any other replacement parts specific to your brand of faucet (like stem packing). With everything lined up, you’re now set for action.
3. Washer Swap-Out
Turn off that main water supply valve clockwise. Once things are dry, remove faucet handles carefully, since rough handling could mean more repair work later on.
Dive into the guts of the beast by loosening up the retaining nut until the old washer reveals itself, hiding under layers of grime and wear. But don’t stop there; this is just one step in conquering your leaky faucet foe.
Key Takeaway:
Stop the drip and save some cash by swapping out that old washer. Gear up with your wrench and screwdriver, turn off the water, and get ready to dive into a DIY fix for your leaky outdoor faucet.
Replacing a Faulty Valve Stem
Say goodbye to that slow drip, drip, drip from your outdoor faucet—it’s likely your valve stem waving the white flag. If you’ve already tried fixing leaky washers and still have leaks, it might be time for a full-on valve stem replacement.
Understanding When It’s Time for Change
You know it’s time to replace the valve stem when simply tightening the packing nut doesn’t stop water from leaking around the handle. And if after swapping out old washers, your outdoor spigot keeps up its weeping act, this could point towards worn-out internals needing more than just minor repairs. Remember, not addressing these issues can lead to serious water waste and even property damage—think of that steady trickle as money down the drain and potential harm to your home’s foundation.
A correct replacement part is key here because mismatched parts are like trying to fit a square peg in a round hole—not going anywhere fast. So let’s get that faulty component sorted with some elbow grease and know-how.
Materials and Tools Needed:
New valve stem
Adjustable wrench or pipe wrench
Screwdriver
Penetrating oil or lubricant (if necessary)
Plumber’s tape (Teflon tape)
Rag or towel
Step-by-Step Instructions:
Turn Off Water Supply: Locate and turn off the main shut-off valve that controls the water supply to the outdoor faucet.
Drain the Faucet: Open the faucet to allow any remaining water in the line to drain completely.
Access the Valve Stem: Remove any handle or cover that conceals the valve stem. Use a screwdriver to loosen and remove screws if necessary.
Remove Packing Nut: Use an adjustable wrench to loosen and remove the packing nut that secures the valve stem. Turn it counterclockwise to unscrew it from the faucet assembly.
Remove Old Valve Stem: Pull the old valve stem out of the faucet assembly. Depending on the condition and design, you might need to wiggle or gently twist the stem to remove it. If it’s stuck, apply penetrating oil or a lubricant to ease its removal.
Inspect and Clean: Inspect the inside of the faucet assembly to ensure it’s clean and free from debris. Use a rag or towel to wipe away any dirt or residue.
Install New Valve Stem: Take the new valve stem and insert it into the faucet assembly. Ensure it fits correctly and aligns with the threads inside.
Reassemble the Faucet: Place the packing nut over the new valve stem and use the wrench to tighten it securely. Be cautious not to overtighten to avoid damaging the threads or the new stem.
Test for Leaks: Turn on the water supply and test the faucet to check for any leaks around the valve stem. If leaks are present, gently tighten the packing nut a bit more.
Apply Plumber’s Tape: Wrap plumber’s tape (Teflon tape) around the threads of the valve stem before reattaching the handle or cover. This helps create a better seal and prevents leaks.
Reattach Handle or Cover: Once the new valve stem is securely in place, reattach the handle or cover, ensuring it’s properly aligned and tightened.
Key Takeaway:
Stop the endless drip from your outdoor faucet by replacing a faulty valve stem. Make sure you’ve got all your tools and the right replacement part to avoid multiple hardware store runs. Tackle it with confidence—out with the old, in with the new, for a leak-free spigot that lasts.
New Packing Nut Installation Step-by-Step
The packing nut insulation in a faucet is crucial for preventing leaks around the valve stem. It’s not insulation in the traditional sense; rather, it’s a component that consists of a packing material (often made of graphite, Teflon, or similar substances) placed inside the packing nut to create a watertight seal around the stem.
Materials and Tools Needed:
New packing material (usually graphite or Teflon)
Adjustable wrench or pipe wrench
Screwdriver (if needed)
Grease (optional)
Plumber’s tape (Teflon tape)
Rag or towel
Step-by-Step Instructions:
Turn Off Water Supply: Locate the shut-off valve that controls the water supply to the outdoor faucet. Turn it off completely to prevent water from flowing while you work.
Drain the Faucet: Open the faucet to drain any remaining water in the line. This step helps prevent water from leaking or spraying when you disassemble the faucet.
Access the Packing Nut: Depending on the faucet design, you might need to remove a handle or cover to access the packing nut. Use a screwdriver to remove any screws or covers necessary.
Loosen the Packing Nut: Use an adjustable wrench or pipe wrench to loosen the packing nut. Turn it counterclockwise to loosen and remove it from the faucet assembly. Be gentle to avoid damaging the threads.
Remove Old Packing Material: Once the packing nut is removed, you’ll see the old packing material inside the faucet assembly. Clean out any remnants of the old packing material using a rag or towel. Ensure the area is clean and free from debris.
Install New Packing Material: Cut a piece of the new packing material (graphite or Teflon) according to the size needed to fit into the faucet assembly. Wrap the new packing material around the stem or place it inside the assembly, ensuring a snug fit.
Reassemble the Faucet: Carefully reinsert the packing nut over the new packing material. Use the wrench to tighten the nut securely but avoid over-tightening to prevent damage.
Test for Leaks: Turn on the water supply and test the faucet to ensure there are no leaks. If you notice any leaks, gently tighten the packing nut a bit more.
Optional: Apply Grease and Teflon Tape: If recommended for your specific faucet type, you can apply a small amount of plumber’s grease to the packing material before reassembling. Additionally, wrap plumber’s tape (Teflon tape) around the threads of the faucet stem before reinstalling the packing nut for a more secure seal.
Replace Handle or Cover: If you removed a handle or cover to access the packing nut, reattach it securely.
Key Takeaway:
Stop that leaky outdoor faucet by simply replacing the packing nut—a quick fix that saves money and prevents water damage. With a wrench in hand, shut off your water supply, remove the old nut, then find a matching new one at your local hardware store for an easy DIY solution.
Conclusion
Time to put your know-how into practice! How to fix a leaking outdoor faucet isn’t just about stopping drips—it’s safeguarding your home from water damage and conserving precious resources.
Remember the basics: Diagnose first, gather your tools next, then shut off that water supply before diving into repairs. Whether it was replacing a worn washer or installing a new valve stem, each step brought you closer to leak-free bliss.
Tackle leaks with confidence. With every twist of the wrench and turn of the screwdriver, you’re mastering outdoor faucet repair. Keep these tips handy for when water goes rogue again—because now you’re equipped to handle it all.
And don’t forget—the right fix not only stops wasteful drips but also brings peace of mind knowing your garden days will be puddle-free and utterly productive once more.
Experience Year-Round Comfort with Anthem’s Comfort Club!
Are you looking to ensure your home’s HVAC system runs smoothly year-round without breaking the bank? Look no further! Join Anthem’s exclusive Comfort Club today for just $14.95 a month!
Membership perks include:
2) Bi-Annual Maintenance Visits: Spring AC tune-up & fall furnace check-up. No hassle scheduling – we’ll reach out when it’s time!
Exclusive Discounts: Enjoy 15% off AC & heater repairs, IAQ products, and duct cleanings.
Reduced Service Fee: Pay only $69 for service calls (normally $99).
Priority Scheduling: Guaranteed scheduling within 24 hours for club members.
Priority Service: On sweltering days, your unit becomes our top priority!
Extended Equipment Lifespan: Keep your HVAC system running longer.
Enhanced Energy Efficiency: Save on utility bills with optimized systems.
And more! Don’t miss out on these incredible benefits! Call Anthem at (855) 268-4369 or visit Anthem’s Website to sign up and schedule your estimate today!